The Jungle Book (Game Boy) : A Complete Guide
Now to a project into which I invested way too much time: A Complete Guide for the Game Boy’s “The Jungle Book” game from 1994. By complete I mean two things.
First, a very detailed guide on how to play through the game. To the best of my knowledge, there is no such guide available on the internet. In fact, there seems to be only very little information about the game at all.
Second, my journey of reverse engineering the game. In order to understand every bit of the game, I reverse engineered the game and created a disassembly. Many of the results, such as the level maps, were used for the walkthrough guide. The GitHub repository is available as open source.
Contents
The Game
The game “The Jungle Book” was actually released for multiple platforms in 1994 with the Game Boy version being the technically most limited. It is a very classic platformer that doesn’t really have much to offer from a game-play perspective. There’s just running, jumping, and defeating enemies - everything underpinned with rather sluggish controls and awkward hit boxes. The graphics are quite neat for a Game Boy game, but the frequently dropping frame rate is really stressful for the eye. So, overall a pretty mediocre 90s Game Boy game. Although the UK-based video game magazine “Computer and Video Games” Issue 150 from May 1994 gave it a solid 87/100 score (see page 91):
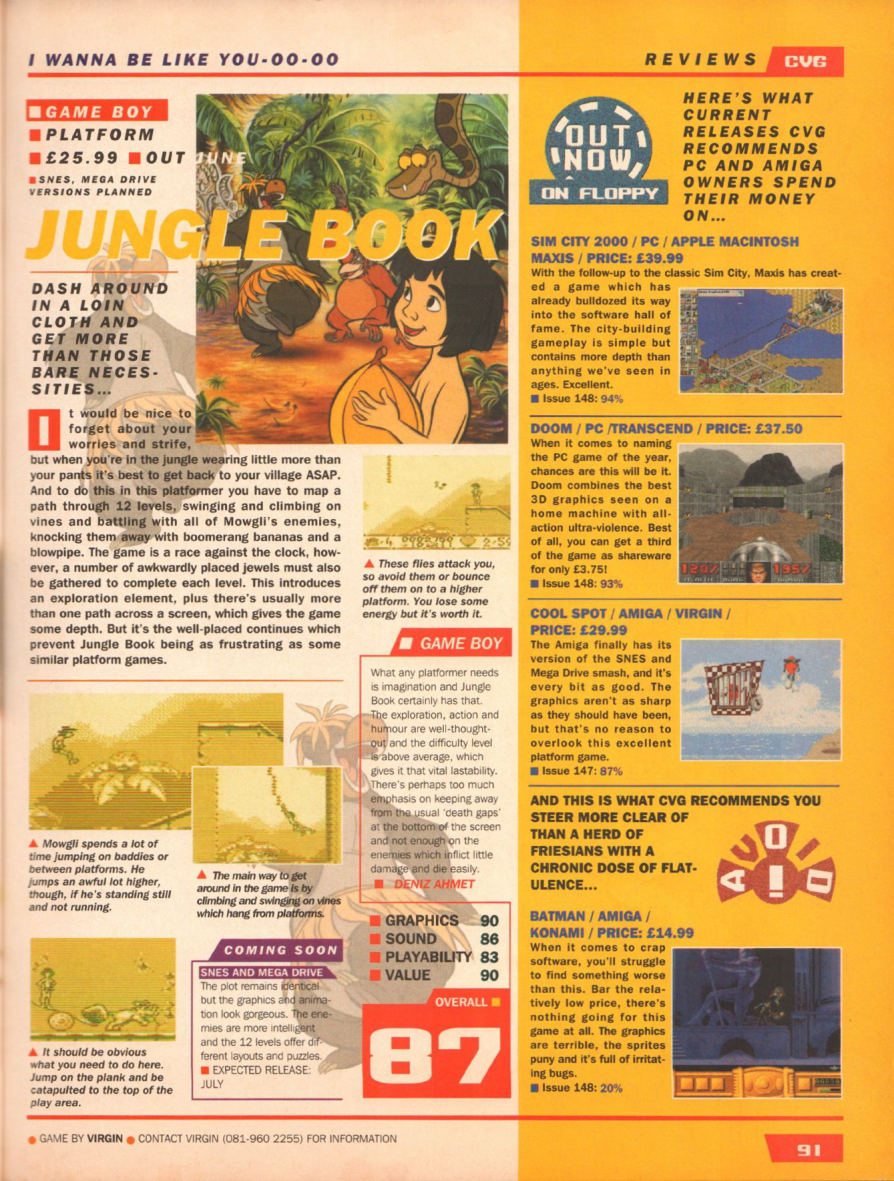
I guess the publishers/developers put everything on the Disney card - a typical pathology of franchise games.
The only outstanding thing was the game’s insane difficulty.
It’s still etched into my mind how I was never able to get past Level 2.
In the 90s I was still very young and far away from my gaming skill all-time high, so almost 25 years later (and exactly 30 years after the game’s release!) I decided to update my conclusion.
Even with more experience and skill I have to admit: the game is hard.
While the levels become manageable with some training, the lack of save states is really annoying.
In order to complete the game, you need to finish the 10 levels without having the chance to save even once.
With the former speedrun record in practice mode already requiring 27 minutes, I really can’t imagine how little children are supposed to beat the game.
But if you really bring the perseverance and motivation to defeat the game, having a plan helps a lot.
Because most of the time, your objective is to collect gems, which are sprinkled across the map.
If you know where these gems are, the game becomes much easier.
And this is why I wrote this guide.
So, if you also want to overcome your childhood trauma of an unbeaten Jungle Book Game Boy game, you have come to the right place.
In the following, I will first list general details about the game, which is then followed by a per-level guide. For every level, I created three different maps from the ROM. First, the plain map extracted from the ROM. Second, an annotated map with gem and enemy locations. Third, a map for a practice-mode speedrun.
History
Since mere gameplay facts about a 30-year-old Game Boy game are perhaps a little too dull, I added a chapter about the hopefully exciting story of the game’s development and some other curious facts. As with most things, a fair starting point might be the Wikipedia article of the game.
Wikipedia mentions that Virgin Games (later renamed to Virgin Interactive Entertainment) started the development of the Genesis/Mega Drive version in 1993, and the game was intended to be delivered in the same year. It is not clear from the Wikipedia article why Virgin Games developed this particular game. However, if you look at the Virgin Games release list, you quickly get the impression that Virgin Games worked through one franchise after the next. So far, they had published games including Aladdin, The Terminator, Dune, Alien, and McDonald’s. I guess “The Jungle Book” game was just next on the list. However, the development lead David Perry including most of his team left Virgin Games during the game’s development. Subsequently, the Genesis version was completed by Eurocom Entertainment Software. They probably completed the Game Boy version too, as the starting screen and credits screen mention Eurocom as the developer:
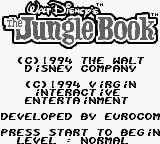
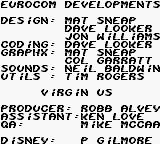
After its completion, the game could finally be found in stores in 1994, where it was released for Genesis, Master System, SNES, NES, and Game Boy. Interestingly, the packaging, the cartridge number (DMG-J7-USA, DMG-J7-USA-1, DMG-J7-EUR, …) as well as the instruction booklet differed between regions. Furthermore, the game was rereleased in 1997 (at least the boxing implies that) as part of “Disney’s Classic”. Here’s my collection of different versions:
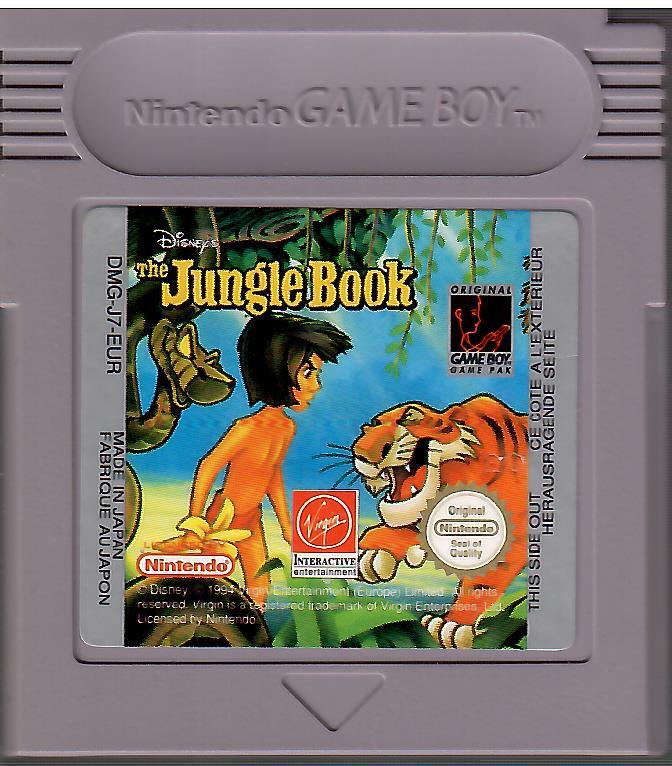
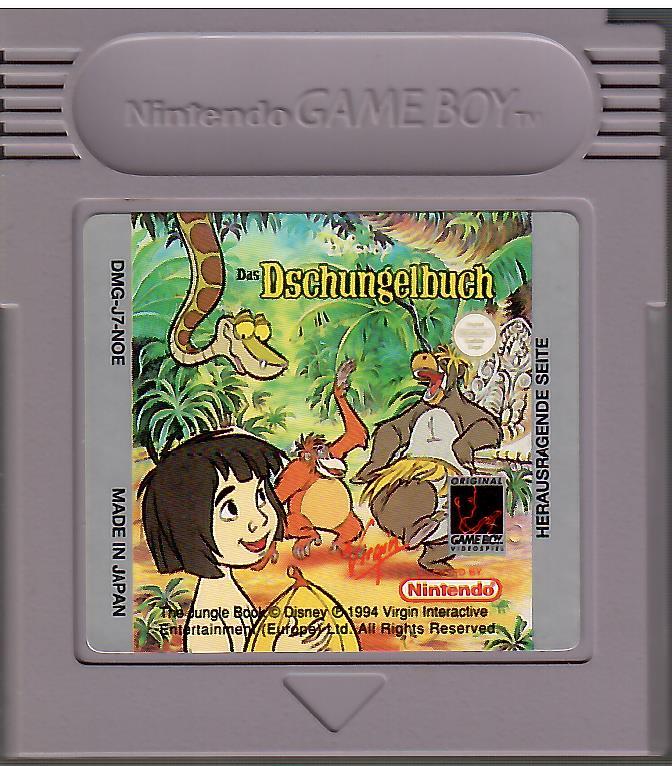
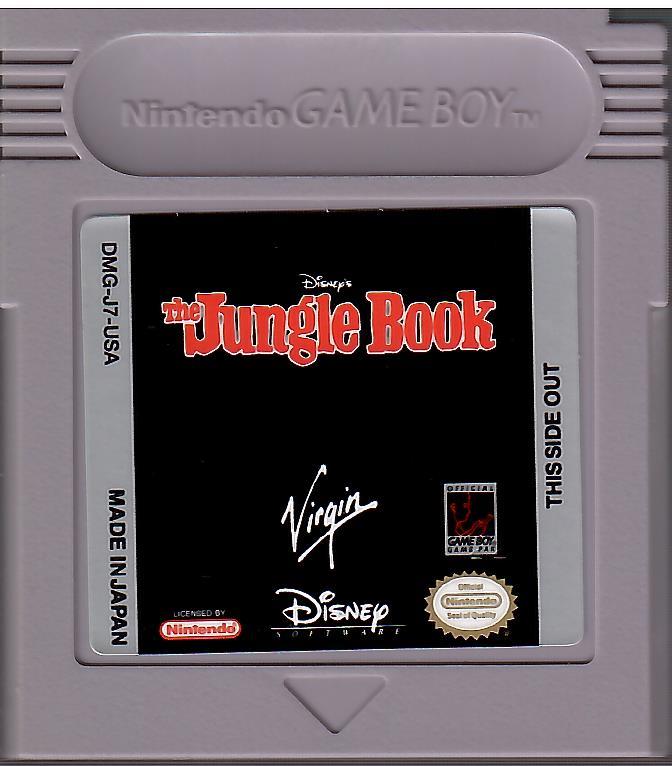
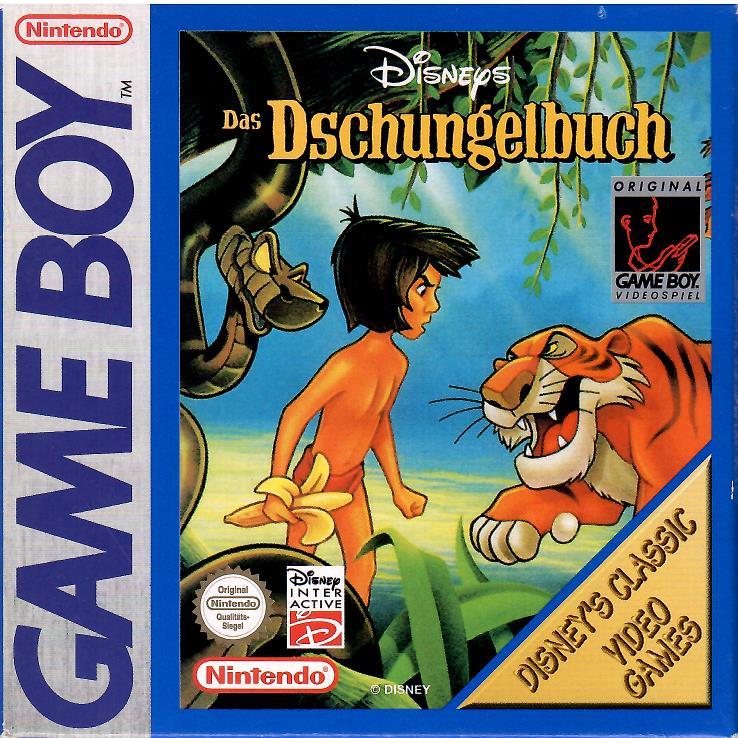
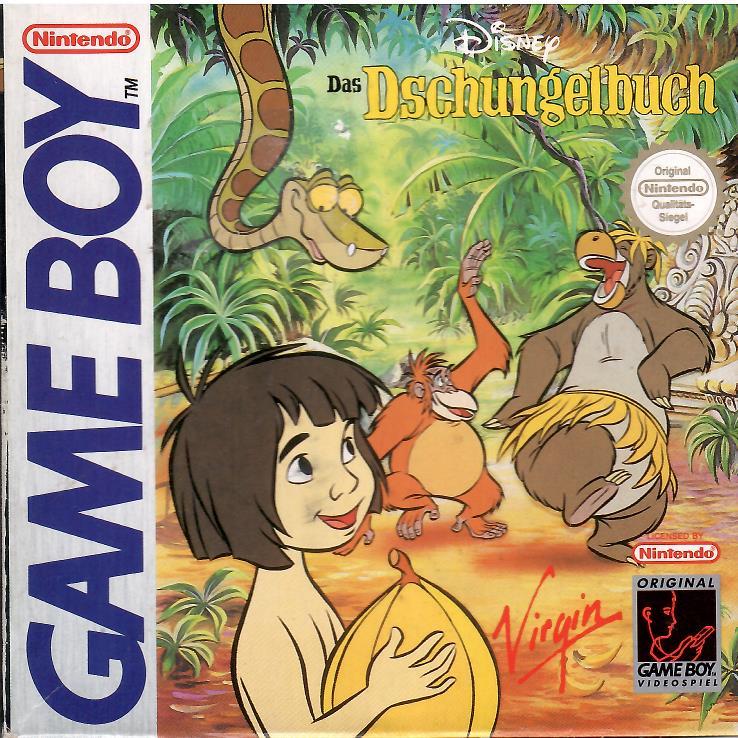
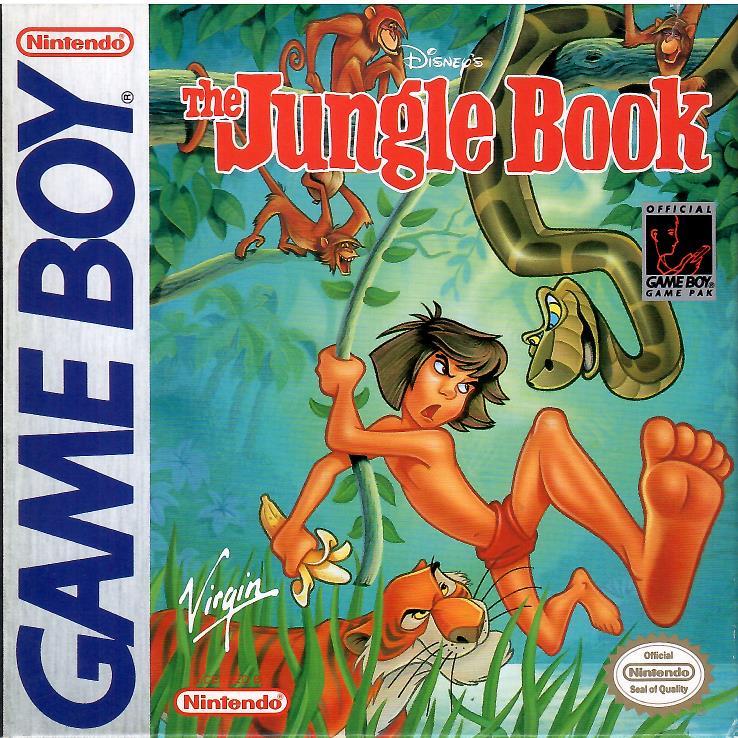
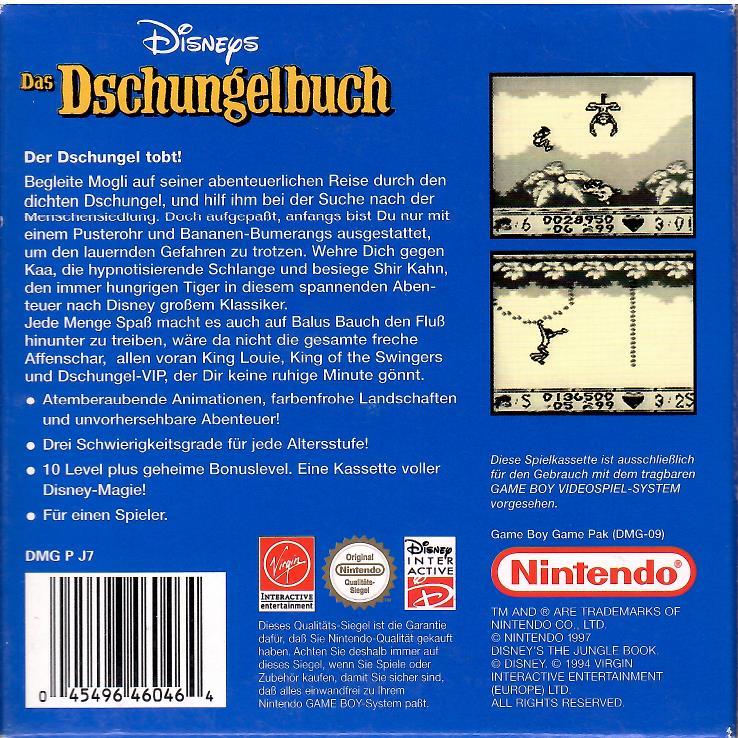
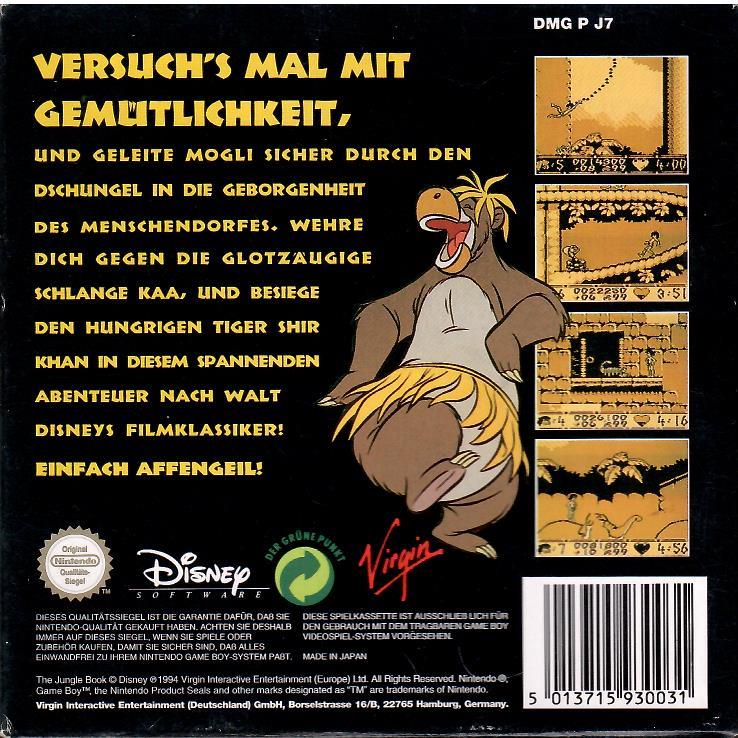
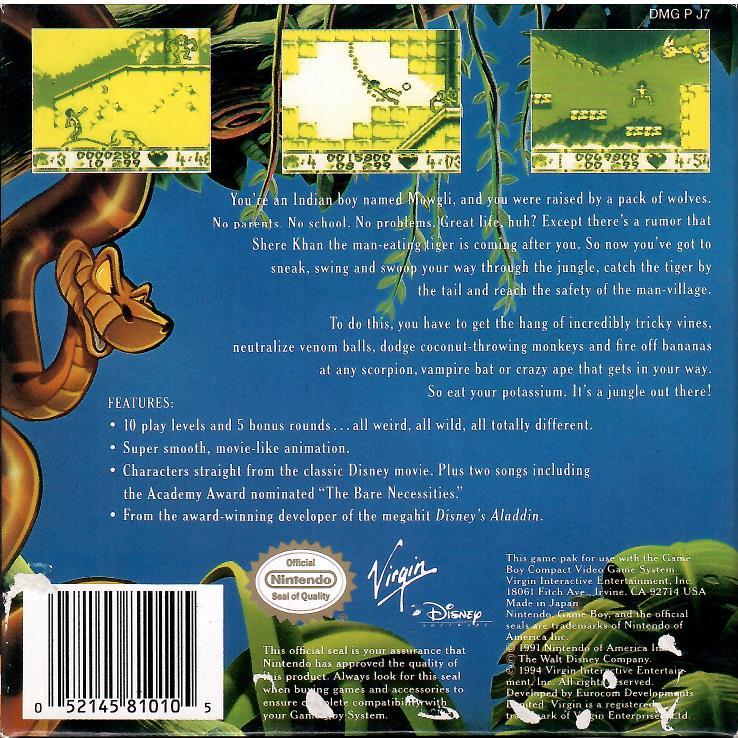
Despite looking different, all games use the same binary with English language output. Interestingly, the US version (DMG-J7-USA) is quite outstanding in many regards. First of all, the cartridge design is very… black. I don’t know if Metallica’s black album was used as inspiration but the black design is really off and does not fit the cheerful setting of Jungle Book at all. Second, the instruction booklet is a fever dream:
As you can see at first glance, the quality of the backgrounds and screenshots used is miserable (it’s not my scanner’s fault 😉). At first, I thought I had bought a fake copy, but after some investigation, I came to a different conclusion: Whoever designed the instruction booklet didn’t have sufficient information or wasn’t very committed. Because the poor picture quality is not the only flaw. If you read through the instruction booklet, you quickly realize that many of the things mentioned, such as 3 difficulties, don’t seem to apply. The screenshots shown don’t match the game either. But if you know the NES version of the game, you will notice that the content of the NES instruction booklet has been adopted here without much thought. The European version is better in that regard and does not contain any major flaws (sorry, I only have it in German):
But also here, the quality of the used sprites is poor (why is Mowgli’s head missing a piece?!). While the European booklet is okish, the packaging mentions three difficulty levels, which is clearly wrong (the game only has a practice and a normal mode).
As a next point, let us move to the game’s perception. When the game was released, the internet was still in its infancy, so any reviews from that time come from gaming magazines. In total, I found five reviews from five magazines. Here’s what they say:
UK-based video game magazine Computer and Video Games Issue 150 from May 1994.
Score: 87/100.
Pro: Gem system gives the game some exploration depth. Nice graphics.
Cons: Enemies are too weak.
A German article from Video Games from June 1994.
Score: 80/100.
Pro: Good graphics. Good animations. Diverse and detailed levels.
Con: Background too lavish.
Another German article from Total! from April 1994.
I couldn’t find a copy online, so I bought an original print from ebay.
Score: 2. They use a grading system similar to the German school grading system. With a “2”, the game is among the best 3 games out of 12 in the magazine’s issue.
Pro: Nice animation and soundtrack.
Con: Levelcodes missing.
Article from from British Total! Nintendo Magazin from April 1994.
Score: 90/100.
Pro: Good graphics. Good animations. Positive feeling of control.
Con: More contrasting background would be great. The game overreaches itself.
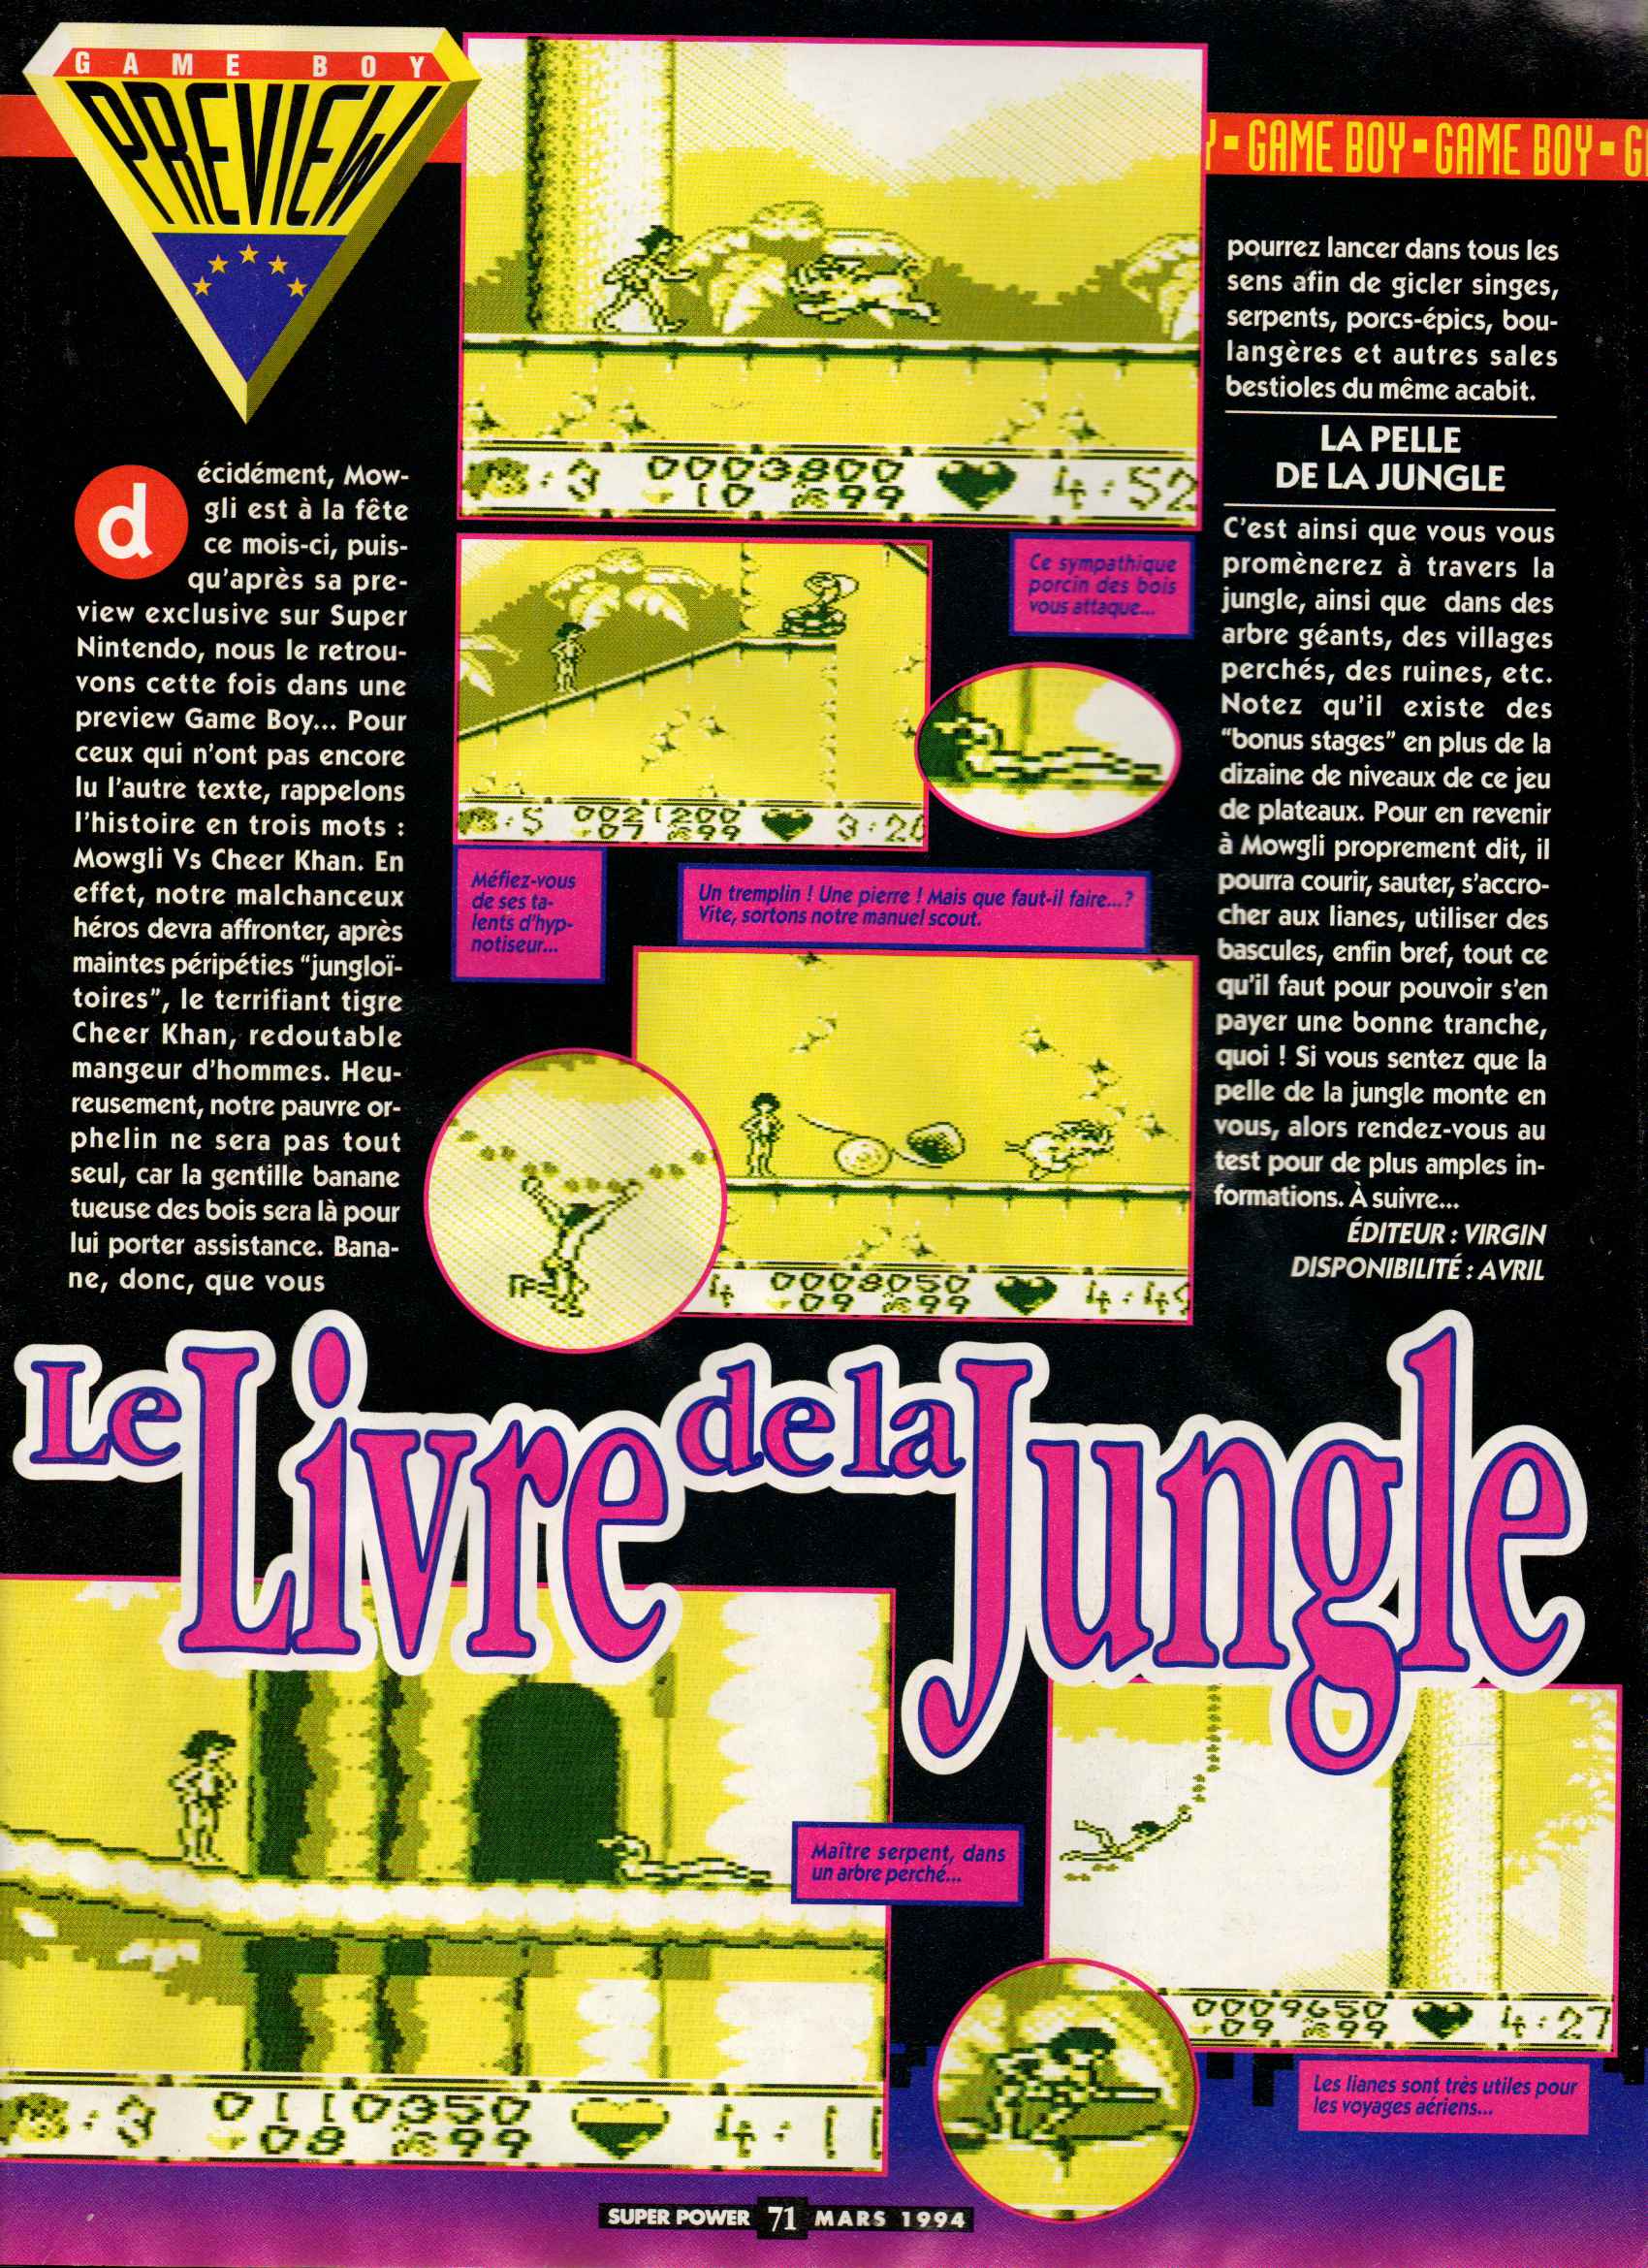
A French article from SUPER POWER from March 1994. My French is a bit rusty, so I asked ChatGPT to translate the article. It’s not really a review but more like a description with some visual impressions. Apparently, there’s a more detailed review following (“À suivre…” -> “To be continued…”), but I wasn’t able to find anything.

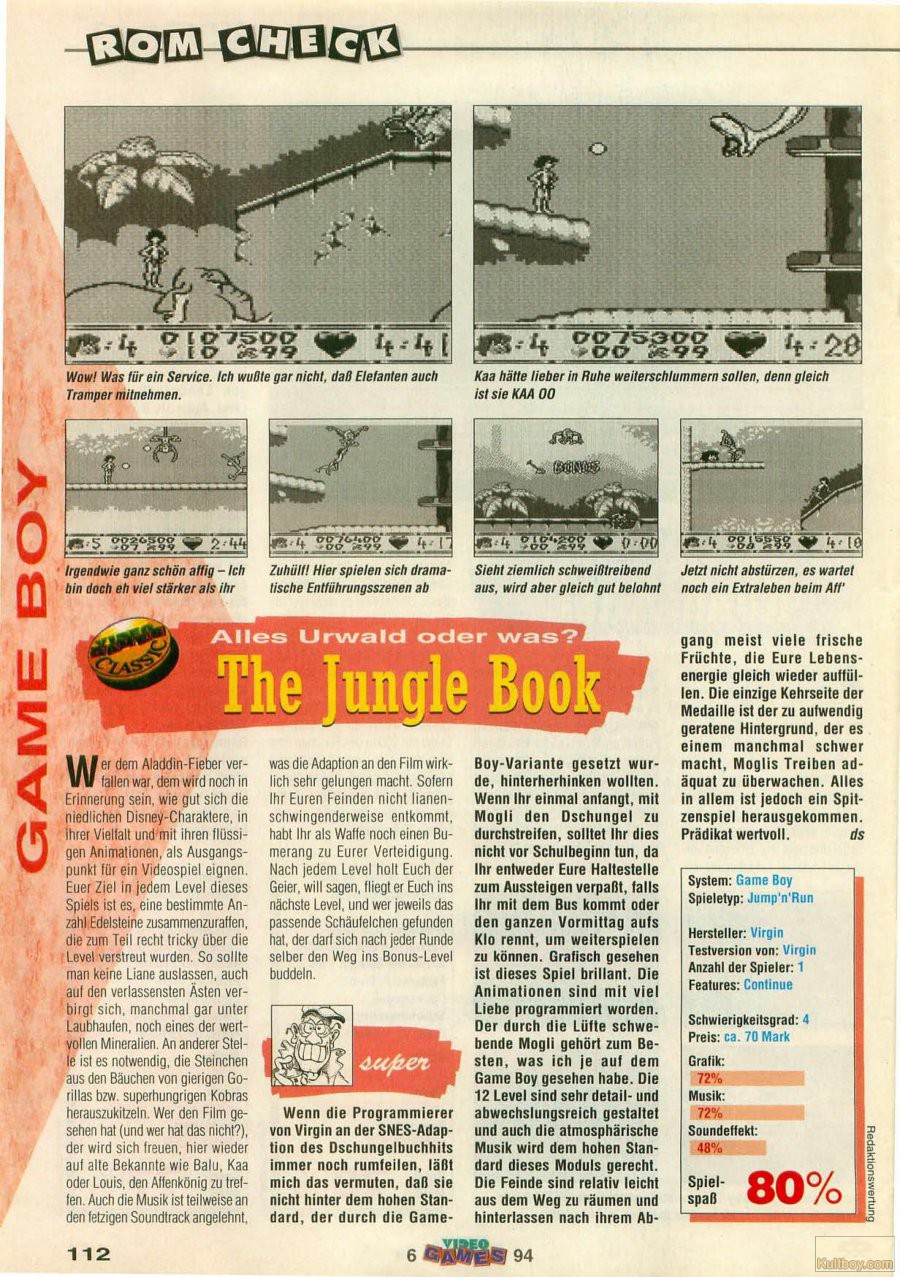
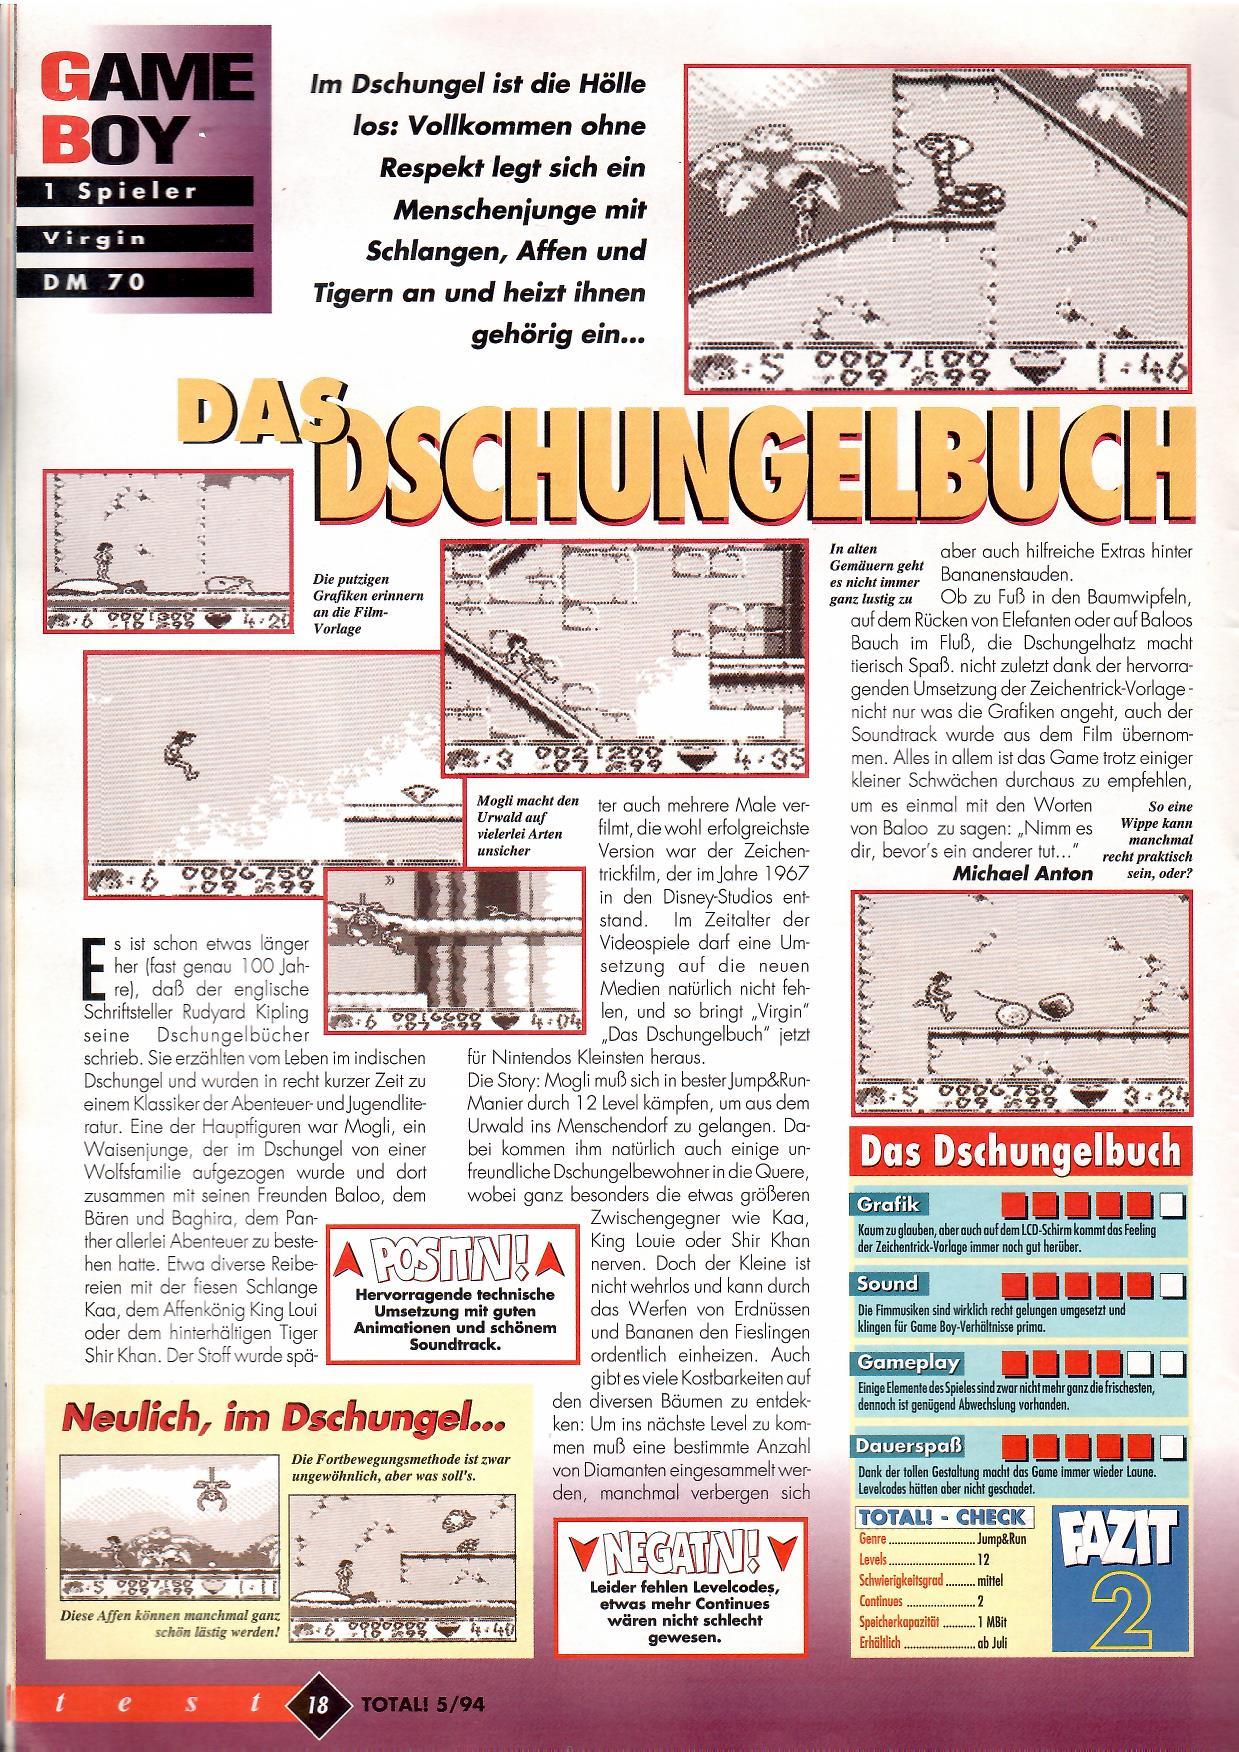
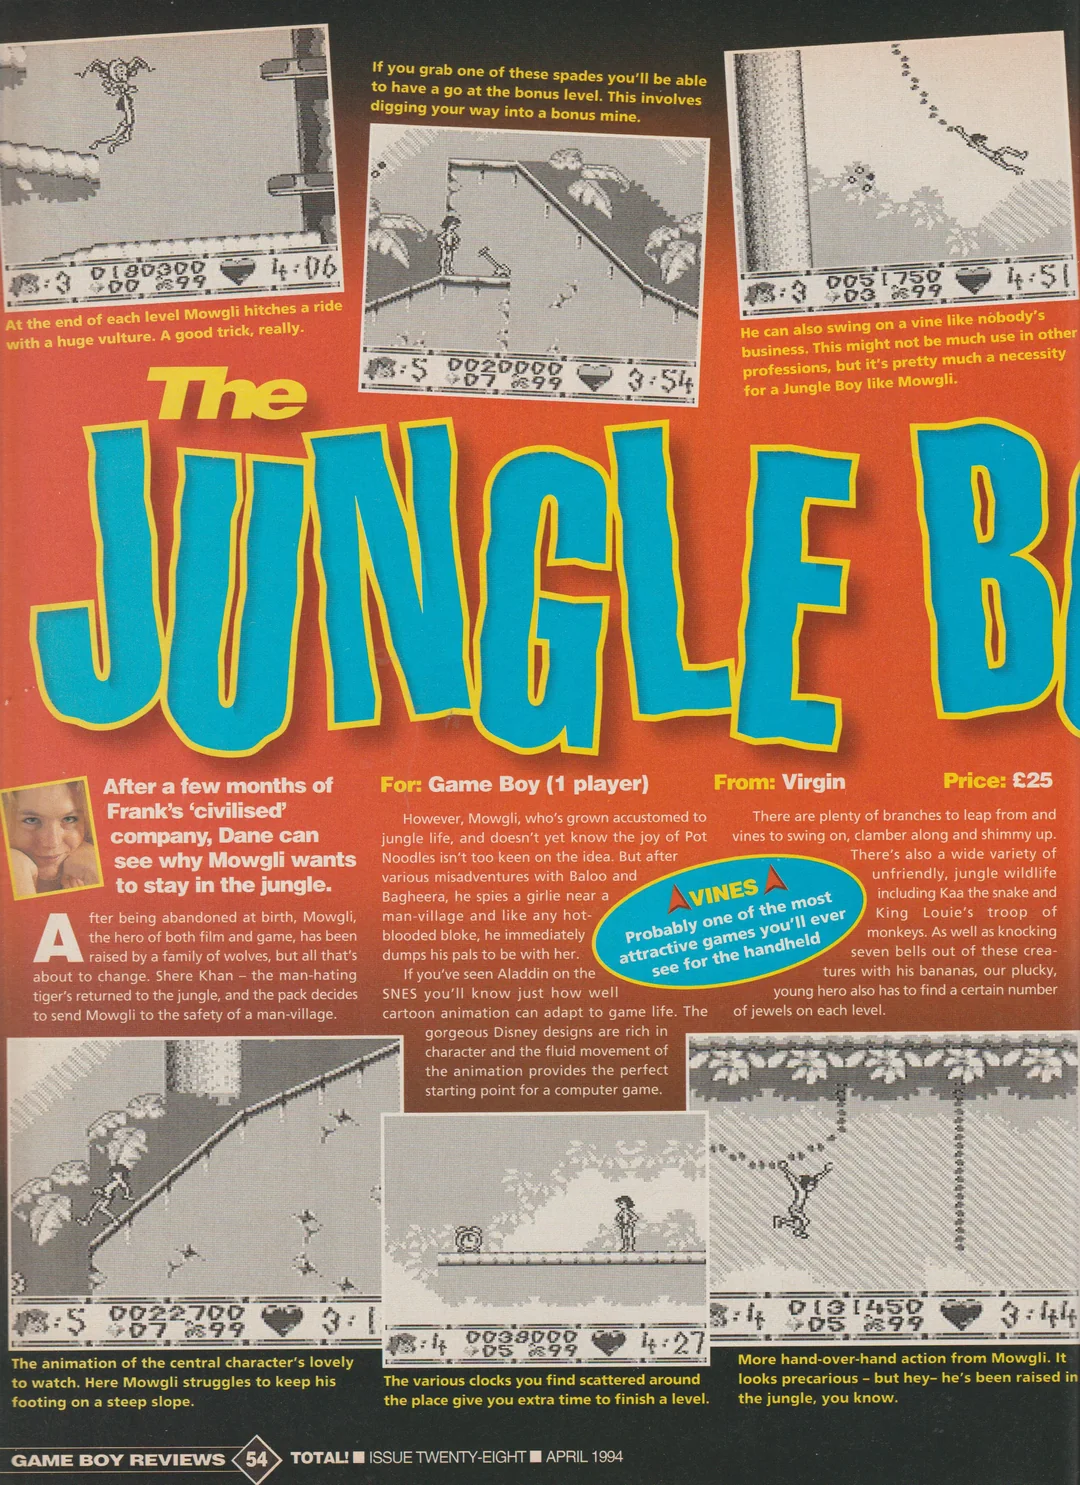
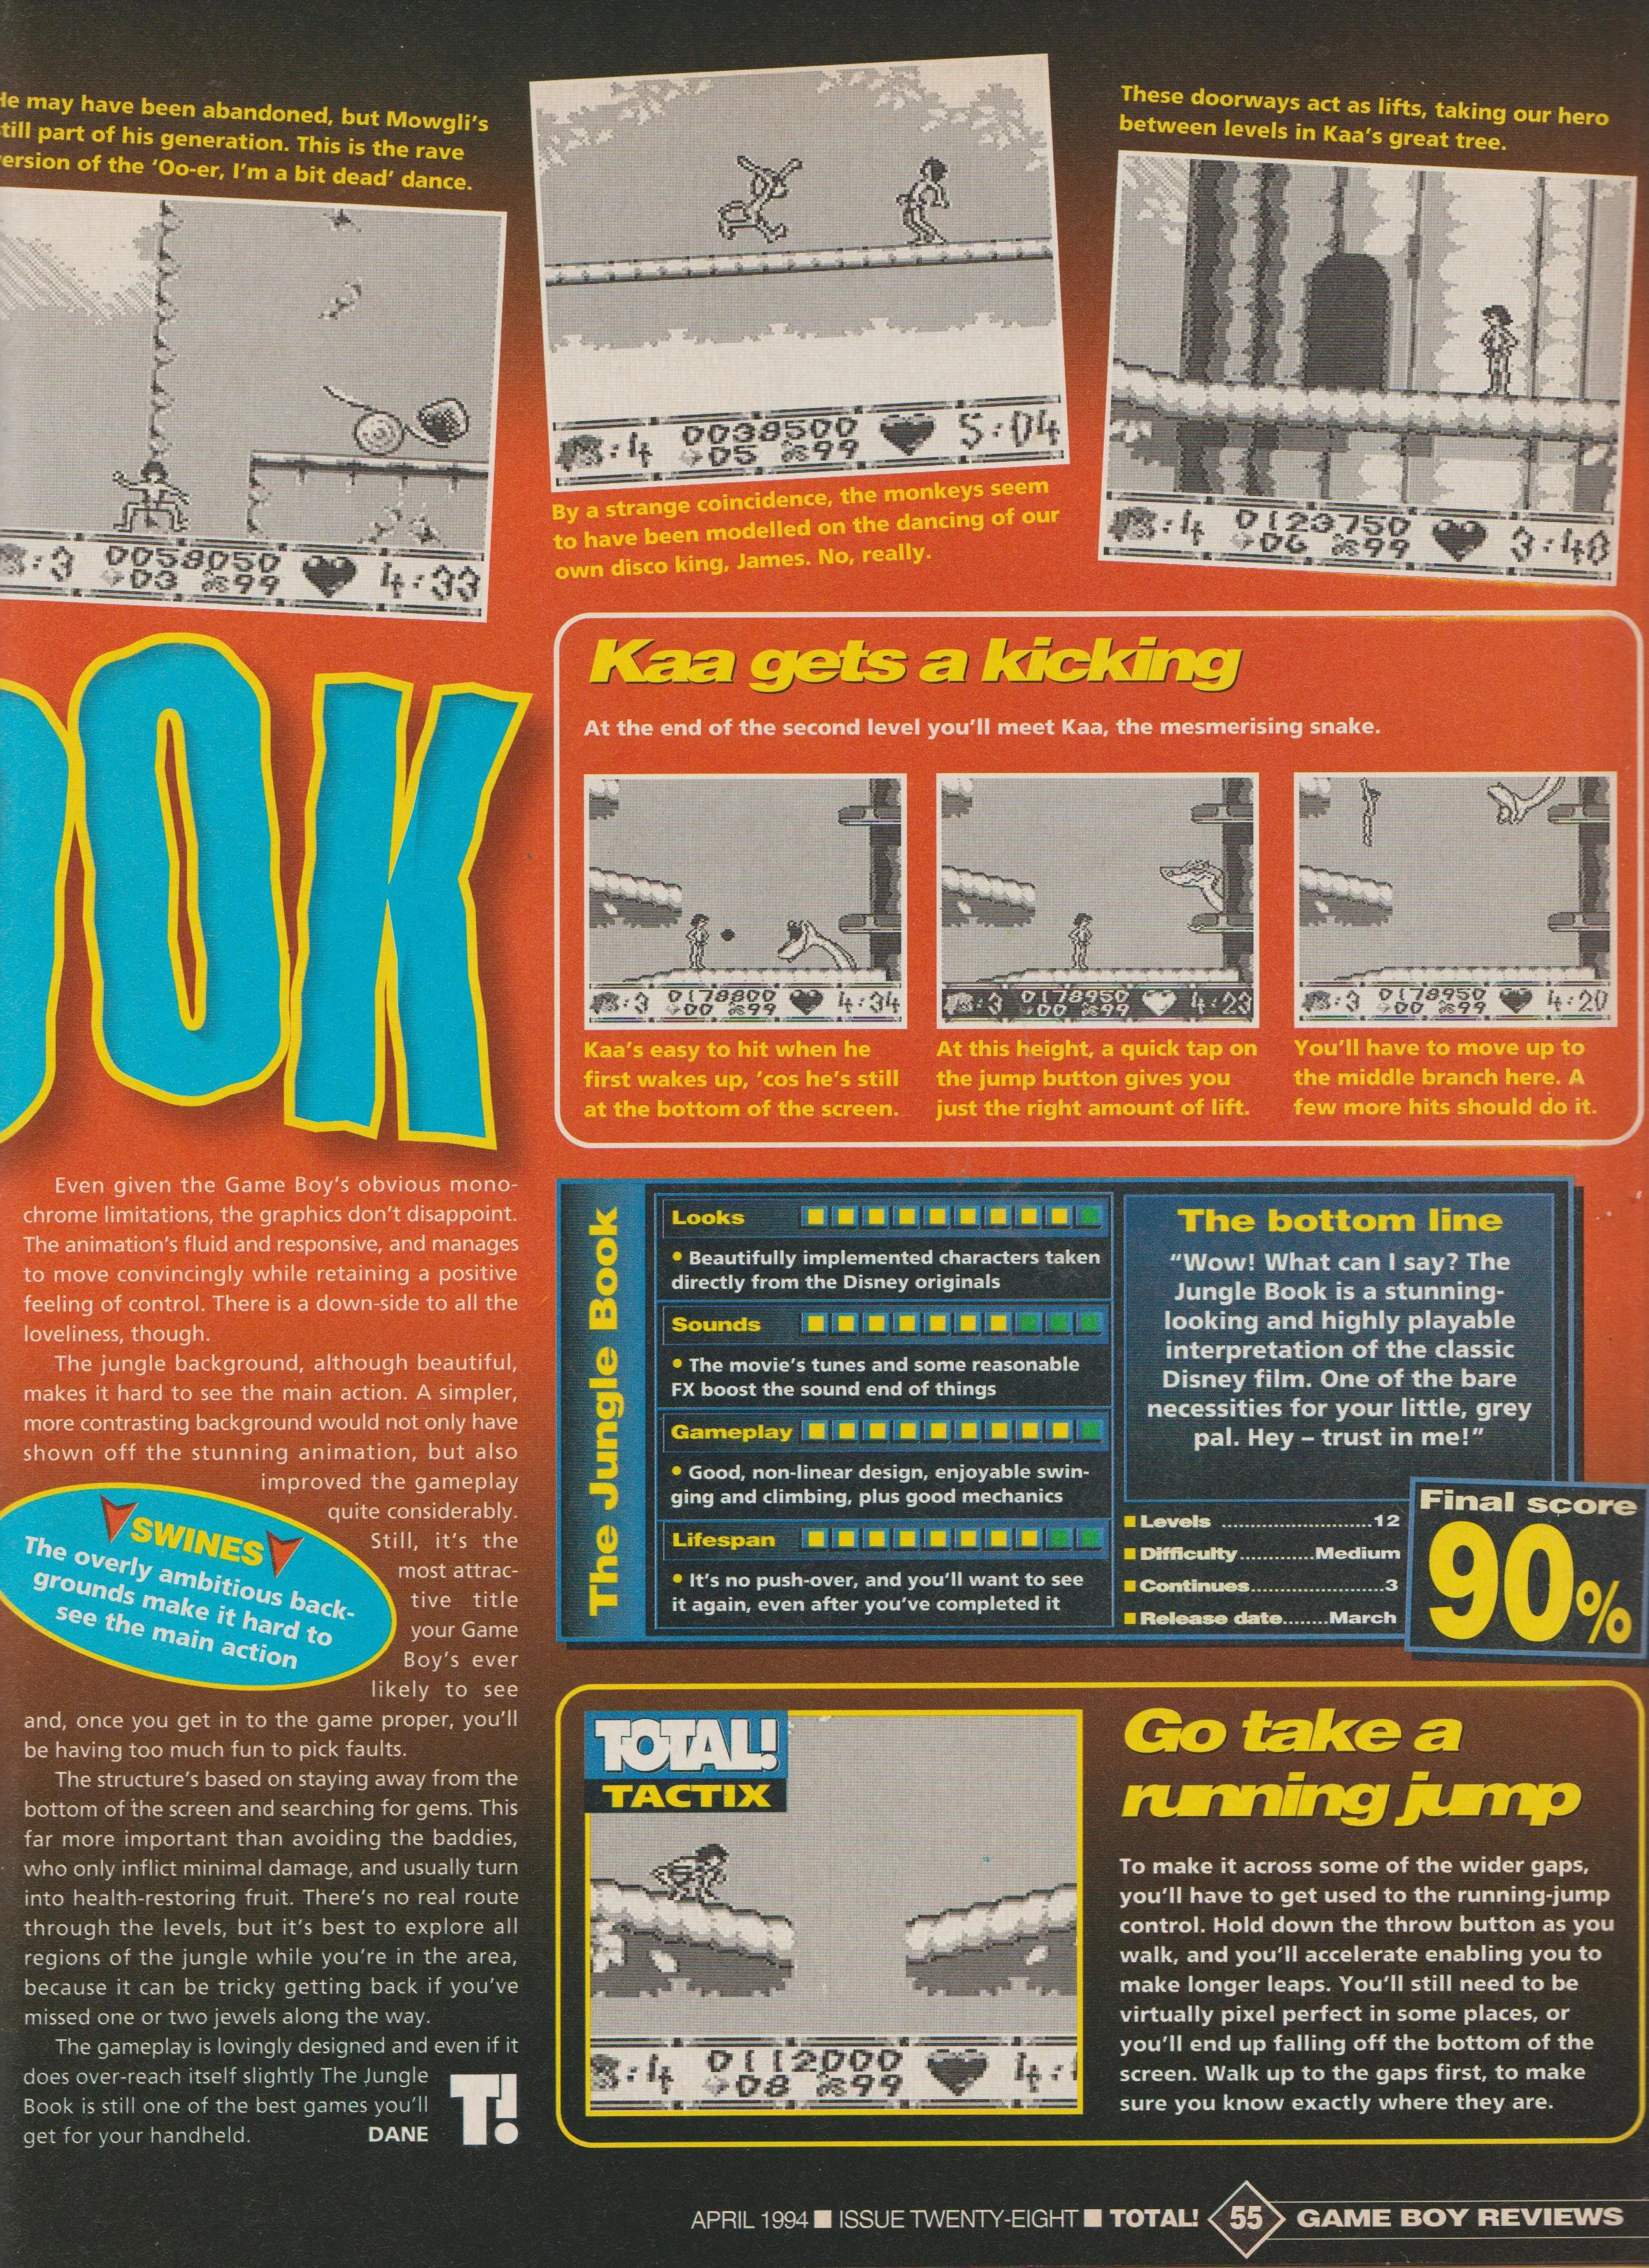
On average, this gives a score of (87/100 + 80/100 + 90/100) / 3 = 86/100.
So, a pretty good score. But maybe too good?
I mean the game is nice to look at (given a constant frame rate), and it’s at least a bit of fun, but an average 86/100 score somehow feels unjustified.
Also, many of the negative points can be interpreted as positive points in disguise.
Like the background being too lavish, or the game trying to overreach itself.
Another thing that is slightly off is the number of mentioned levels.
Four of the magazines wrote about the game having 12 levels.
Well, in theory there are 12 levels, but one is a bonus level, and another one is just a transition animation.
Especially the latter cannot really be counted as a level.
Also, the mentioned number of continues is off in two magazines (magazines say 2 and 3 or 4; the actual number is 6),
as well as the size of the cartridge (1 MiB mentioned; actual ROM size is 128 KiB).
Overall, it feels like someone sent these magazines some predetermined scores and information.
But well, maybe my feeling is just wrong and I’m the only person who doesn’t consider the game to be highly outstanding. That’s why I tried to find independent user reviews on the net. You can’t find many user-written reviews of the game, but I was able to find three. Here’s their conclusion:
User review 1 from 2022 gave it a 7/10.
Pro: Good graphics.
Con: Not much variation among levels. Stiff controls. Awkward floor hitbox. Annoying leaps of faith. Time limit too strict.
User review 2 from 2020 gave it 48/100.
Pro: Good graphics.
Con: Not knowing what to do. No hints for the gems. Awkward movement. Too much blurring.
User review 3 from 2006 gave it a 5/10.
Pro: Nothing.
Con: Not knowing what to do. Annoying when the last item cannot be found.
The user reviews all agree on the same facts: the game’s graphics are nice to look at, but the awkward gem collecting system with the stiff controls ruins the game. On average, this gives a score of (70/100 + 48/100 + 50/100) / 3 = 56/100. So, quite a contrast to the 86/100 average score of the gaming magazines.
I’m currently doing further investigations and will update this section from time to time. But for now, that’s it!
Basic Game Facts
Gameplay
- The game comprises 10 levels that have to be defeated in order to reach the credits screen.
- You cannot save. If you want to beat the game, you have to beat all levels in one session.
- In the start menu, you can set the game to practice mode (it should rather be “easy mode” IMHO) by pressing SELECT. I highly recommend this mode.
- In order to finish a level, you need to collect all gems (7 in practice mode and 10 in normal mode). Only for Level 8 (FALLING RUINS) collecting a single gem is sufficient.
- Some levels additionally require you to meet/defeat characters such as Kaa or Baloo.
- You have 5 minutes of time to finish a level.
- Mowgli has 52 health points.
- All enemies deal 4 damage per hit in normal mode and 2 damage in practice mode.
- Water deals continuous damage, independent of the chosen mode.
- You have 6 lives.
- You have 4 continues in normal mode and 6 continues in practice mode.
Controls
- Press SELECT in the start menu to toggle difficulty modes.
- Press SELECT in the game to switch between different items/weapons.
- Press START to (un)pause the game.
- Use the D-pad to control Mowgli.
- Press A to jump.
- Press B to shoot projectiles and run faster.
- If you press A+B+START+SELECT, the game will be restarted.
Items
The following items can be found across the map or are dropped by enemies:
- Boomerang
: A boomerang that can be used as a weapon.
- Double banana
: A double banana that can be used as a weapon.
- Extra life
: Collect Mowgli’s head to get an extra life.
- Extra time
: Gives some extra time when collected (1 minute in normal, 2 minutes in practice).
- Extra level
: If you collect the shovel, there will be a bonus level before the next level to collect additional items.
- Flower
: Activates a checkpoint when walking through the flower.
- Gem
: Collect gems to beat a level.
- Grapes
: Fills up your health bar when collected.
- Leaf
: Can only be collected in the bonus level. Grants an additional continue.
- Medicine man mask
: Grants invulnerability if selected as a weapon.
- Pineapple
: Just gives some extra points.
- Stones
: Stones that can be used as a weapon.
Weapons
There are 5 different weapons/items the player can use:
- Banana (Index 0): Default weapon. Unlimited.
- Double Bananas (Index 1): 0 by default. Dropped by enemies.
- Boomerang (Index 2): 0 by default. Dropped by enemies.
- Stones (Index 3): 0 by default. Dropped by enemies.
- Mask (Index 4): 0 by default. Dropped by enemies. Grants you invincibility for a given time. During invincibility you shoot your default bananas.
The damage of the weapons (except for the default banana) is calculated as follows:
damage = (weapon_index * 2 + 1) * (NormalMode ? 1 : 2)
Or summarized in a table:
| Weapon | Normal Mode Damage | Practice Mode Damage |
|---|---|---|
| Banana | 3 | 6 |
| Double Banana | 3 | 6 |
| Boomerang | 5 | 10 |
| Stones | 7 | 14 |
Note that the double banana may hit a target twice (once with each individual banana) leading to twice the damage.
Enemies
During your adventure, you will face many different enemies. Compared to platformers like Super Mario Land, the enemies in this game are not really an immediate threat to your health. In normal mode, collisions with enemies deal 4 damage, and in practice mode it is 2. With 52 starting health points, you can take quite a few hits before having a problem. As with most Game Boy platformers, the enemies are quite bland and essentially boil down to moving obstacles. For the sake of completeness of this guide, let me give you a list of all non-boss enemies in this game (the enemy animations were extracted with my animation extractor):
![]() Armadillo: An enemy that can curl up to avoid taking damage. Works similarly to the porcupine.
Armadillo: An enemy that can curl up to avoid taking damage. Works similarly to the porcupine.
![]() Bat: A flying obstacle.
Bat: A flying obstacle.
![]() Boar: A running obstacle.
Boar: A running obstacle.
![]() Cobra: A standing obstacle that shoots projectiles.
Cobra: A standing obstacle that shoots projectiles.
![]() Crawling snake: Unkillable, crawling enemy. Similar to the lizard.
Crawling snake: Unkillable, crawling enemy. Similar to the lizard.
![]() Crocodile: Can be used as a platform. But beware: it might open its mouth.
Crocodile: Can be used as a platform. But beware: it might open its mouth.
![]() Fish: A jumping, unkillable obstacle. In Level 5, you can use it to skip the floating Baloo part.
Fish: A jumping, unkillable obstacle. In Level 5, you can use it to skip the floating Baloo part.
![]() Flying Bird: A flying obstacle.
Flying Bird: A flying obstacle.
![]() Frog: Can jump and shoot projectiles.
Frog: Can jump and shoot projectiles.
![]() Hippo: Floating Baloo can collide with these.
Hippo: Floating Baloo can collide with these.
![]() Lizard: Unkillable, crawling enemy. Similar to the crawling snake.
Lizard: Unkillable, crawling enemy. Similar to the crawling snake.
![]() Monkey: The most frequent enemy in the game. May walk, stand, or hang down.
Monkey: The most frequent enemy in the game. May walk, stand, or hang down.
![]() Mosquito: I guess this represents some kind of mosquito swarm. Often placed near lianas.
Mosquito: I guess this represents some kind of mosquito swarm. Often placed near lianas.
![]() Porcupine: An enemy that can curl up to avoid taking damage. Works similarly to the armadillo.
Porcupine: An enemy that can curl up to avoid taking damage. Works similarly to the armadillo.
![]() Scorpion: Walking enemy that shoots projectiles.
Scorpion: Walking enemy that shoots projectiles.
Cheats
After searching on the internet and reverse engineering large parts of the game, I’m almost certain: there are no intentional cheats in this game. This is a bit of a bummer, especially when comparing the Game Boy game against its other versions, but also no big surprise. I guess cramming cheat features into the small 128 KiB cartridge wasn’t deemed too important.
But luckily there’s a way to retrospectively add cheats to a game using cheat modules, like Game Genie or Game Shark. The working principle of these cheat modules is quite simple: they set a given memory address to a given value. The address and value are provided by you to the cheat modules using cheat codes. Since attributes like health or number of projectiles often stick to a static address, it’s very simple to manipulate them. You just need to know where they are located in the memory. Since I was already reverse-engineering the game, getting these memory locations was a byproduct. Here are some Game Shark codes that I created (remove the comment before pasting them):
019985c1  ; Infinite double bananas
019986c1  ; Infinite boomerangs
019987c1  ; Infinite stones
019988c1  ; Infinite invincibility
0134b8c1  ; Infinite health
0109c3c1  ; Infinite time
0109b7c1  ; Infinite lives
Note that you don’t necessarily need a real Game Shark or Game Genie. Many popular emulators also support these codes.
The Levels
Level 1 (JUNGLE BY DAY)
The first, and probably most simple level, plays in the jungle by day. I think there is no real association with the movie’s plot and it just serves as an introduction. The gimmick of this level is a catapult. With a tool-assisted replay, the level can be beaten in 0:42.
width x height (in pixels): 3072 x 512
Items:
- 1x bonus level
- 1x boomerang
- 1x double banana
- 2x extra lives
- 2x mask
- 0x stones
- 2x time
Passing Criteria:
- Collect all gems

Level 2 (THE GREAT TREE)
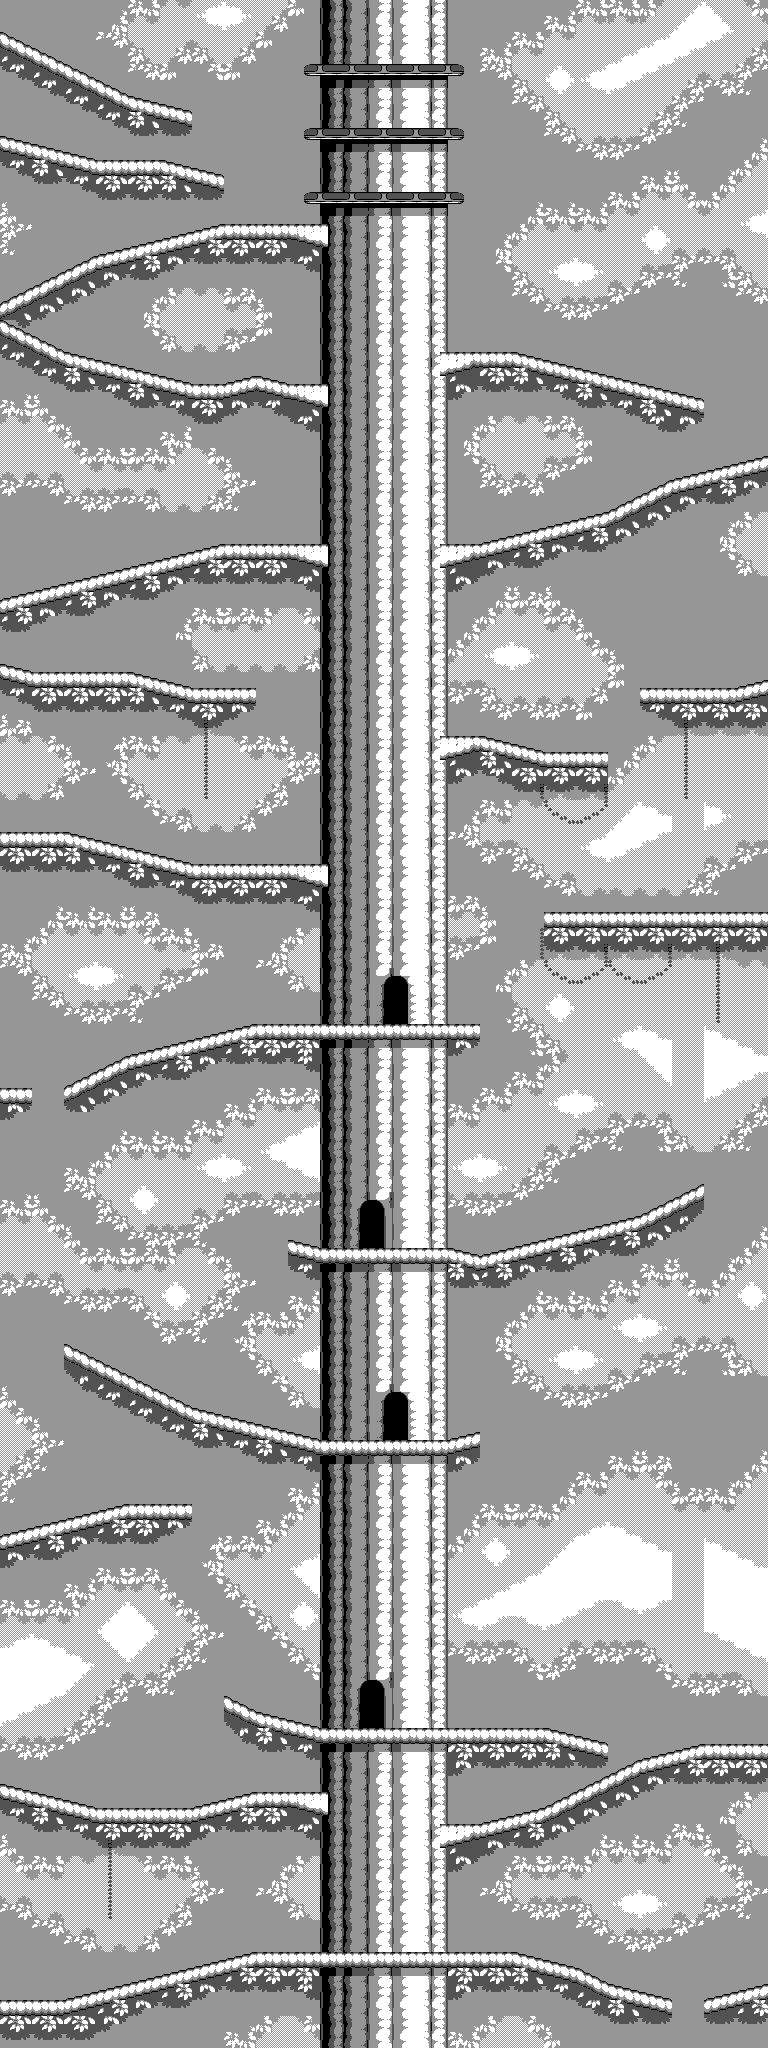
The second level takes place at the Great Tree, in which Kaa resides. In the game, there’s pretty much no plot, but I guess this is the point in the movie where Mowgli and Bagheera meet Kaa for the first time. After collecting all gems you still have to defeat Kaa in some kind of boss battle at the end of the level. The gimmick in this level are some kind of elevators in the tree’s stem. With a tool-assisted replay, the level can be beaten in 1:00.
width x height (in pixels): 768 x 2048
Passing Criteria:
- Collect all gems
- Defeat Kaa
Level 3 (DAWN PATROL)
After the encounter with Kaa, Mowgli meets Colonel Hathi and his dawn patrol. The dawn patrol also represents this level’s gimmick: A walking elephant herd that can be used as a platform. With a tool-assisted replay, the level can be beaten in 0:50.
width x height (in pixels): 5376 x 320
Items:
- 1x bonus level
- 1x boomerang
- 0x double banana
- 0x extra lives
- 1x mask
- 0x stones
- 0x time
Passing Criteria:
- Collect all gems

Level 4 (BY THE RIVER)
This is the first level where you encounter water. Being in the water progressively reduces your health until you die. Unfortunately, the invincibility mask does not work against water. I would say that this is one of the harder levels as falling into the water may happen frequently. At the end of this level, you have to defeat Baloo. With a tool-assisted replay, the level can be beaten in 1:02.
width x height (in pixels): 4096 x 512
Items:
- 1x bonus level
- 2x boomerang
- 0x double banana
- 1x extra lives
- 0x mask
- 3x stones
- 1x time
Passing Criteria:
- Collect all gems
- Defeat Baloo

Level 5 (IN THE RIVER)
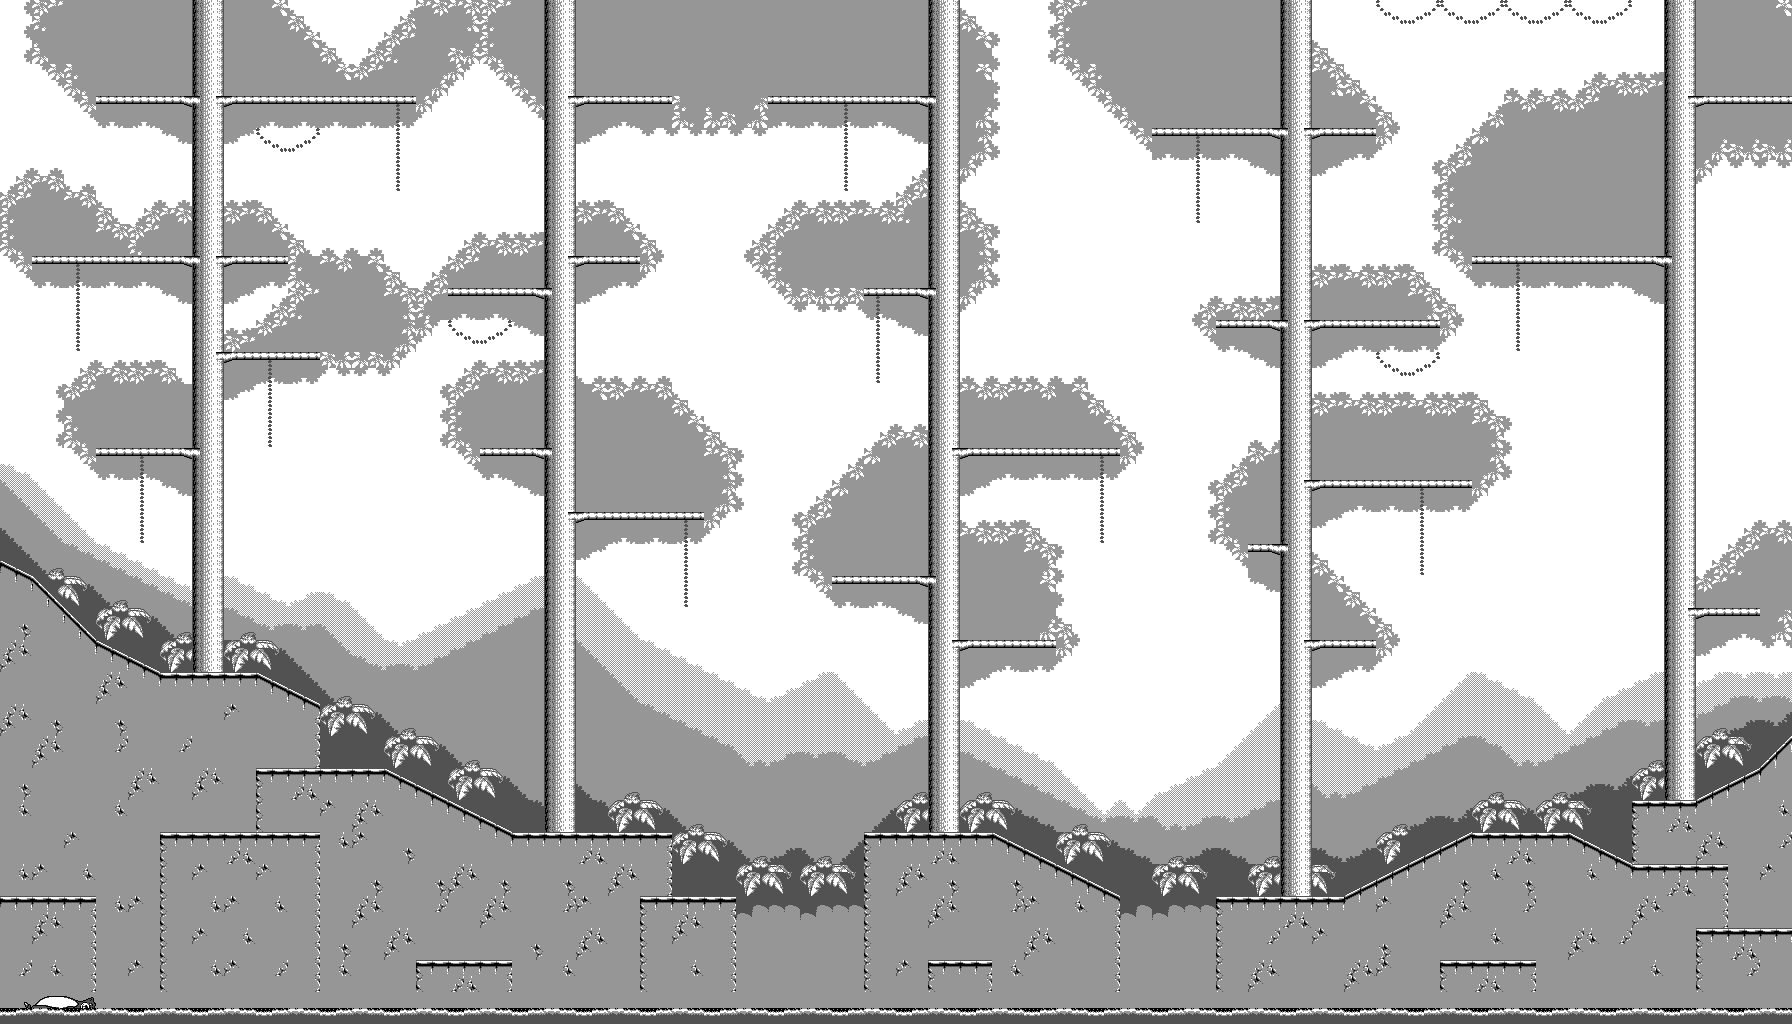
Loosely following the plot of the movie, Mowgli is floating down the river on Baloo. Interestingly, you can shorten the level significantly by using one of the fish at the beginning of the level to push you on a platform. This avoids floating down the whole river and saves more than a minute. With a tool-assisted replay, the level can be beaten in 0:39.
width x height (in pixels): 1792 x 1024
Items:
- 1x bonus level
- 1x boomerang
- 2x double banana
- 1x extra lives
- 1x mask
- 0x stones
- 1x time
Passing Criteria:
- Collect all gems
Level 6 (TREE VILLAGE)
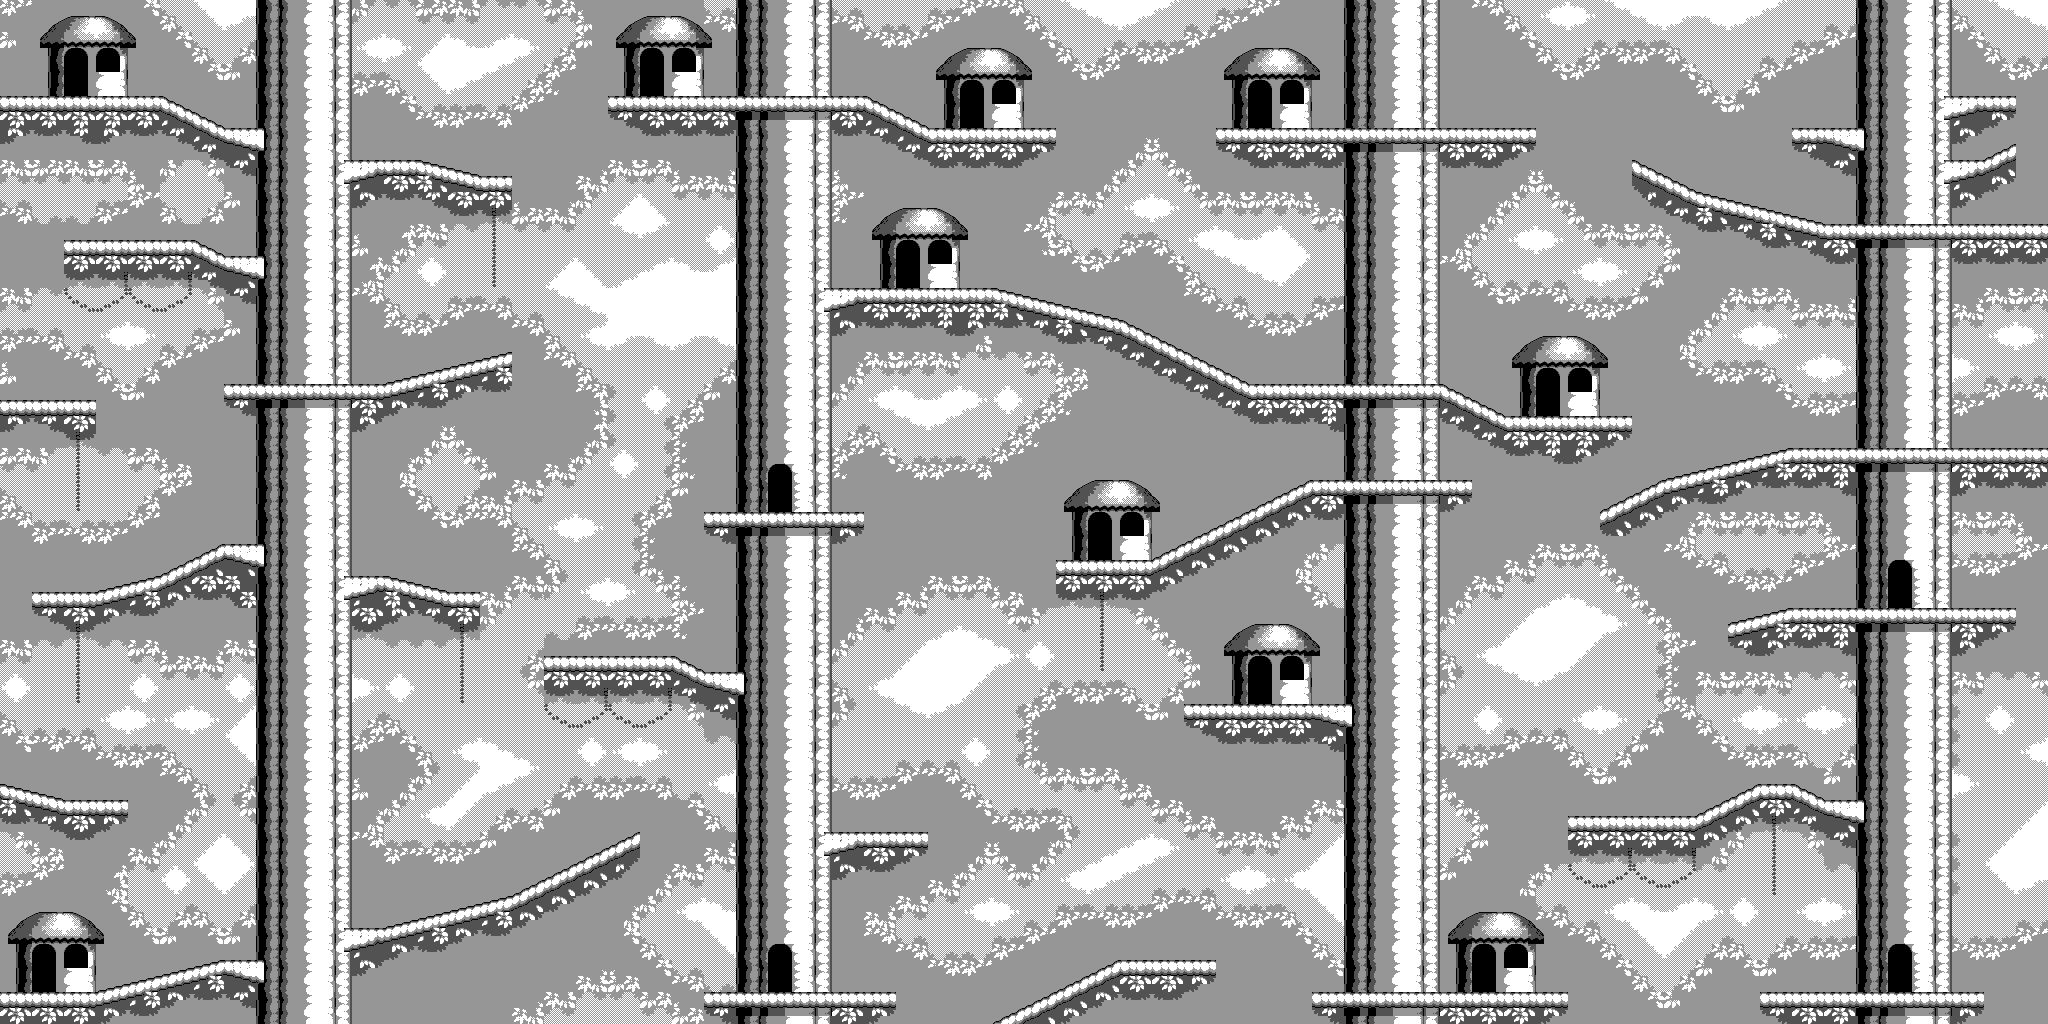
Next, Mowgli is in the tree village where he has to defeat the monkeys. This level is relatively easy with its gimmick being some teleporting tree houses. With a tool-assisted replay, the level can be beaten in 1:10.
width x height (in pixels): 2048 x 1024
Items:
- 1x bonus level
- 1x boomerang
- 0x double banana
- 0x extra lives
- 0x mask
- 2x stones
- 1x time
Passing Criteria:
- Collect all gems
- Defeat the monkeys
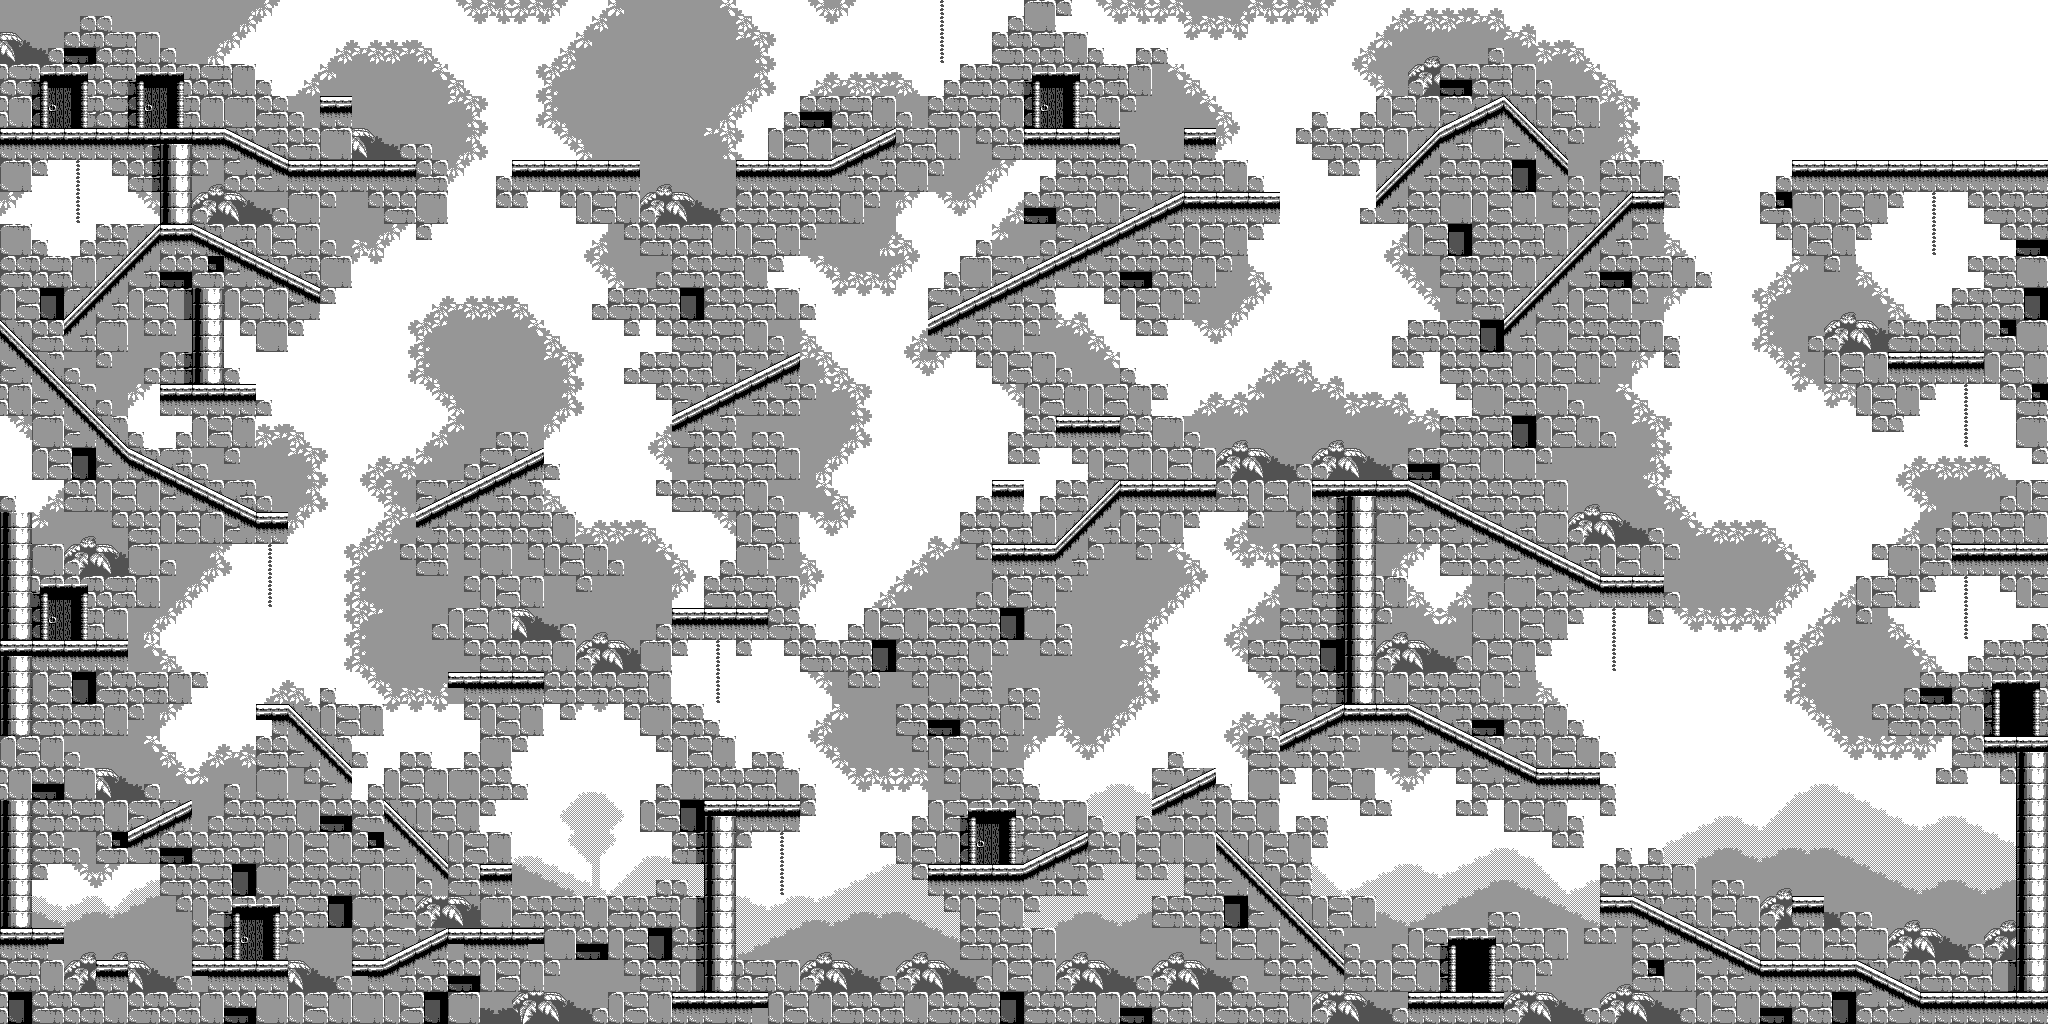
Level 7 (ANCIENT RUINS)
Again a rather easy level with teleporting doors as a gimmick. With a tool-assisted replay, the level can be beaten in 0:35.
width x height (in pixels): 2048 x 1024
Items:
- 1x bonus level
- 2x boomerang
- 2x double banana
- 1x extra lives
- 1x mask
- 0x stones
- 1x time
Passing Criteria:
- Collect all gems
Level 8 (FALLING RUINS)
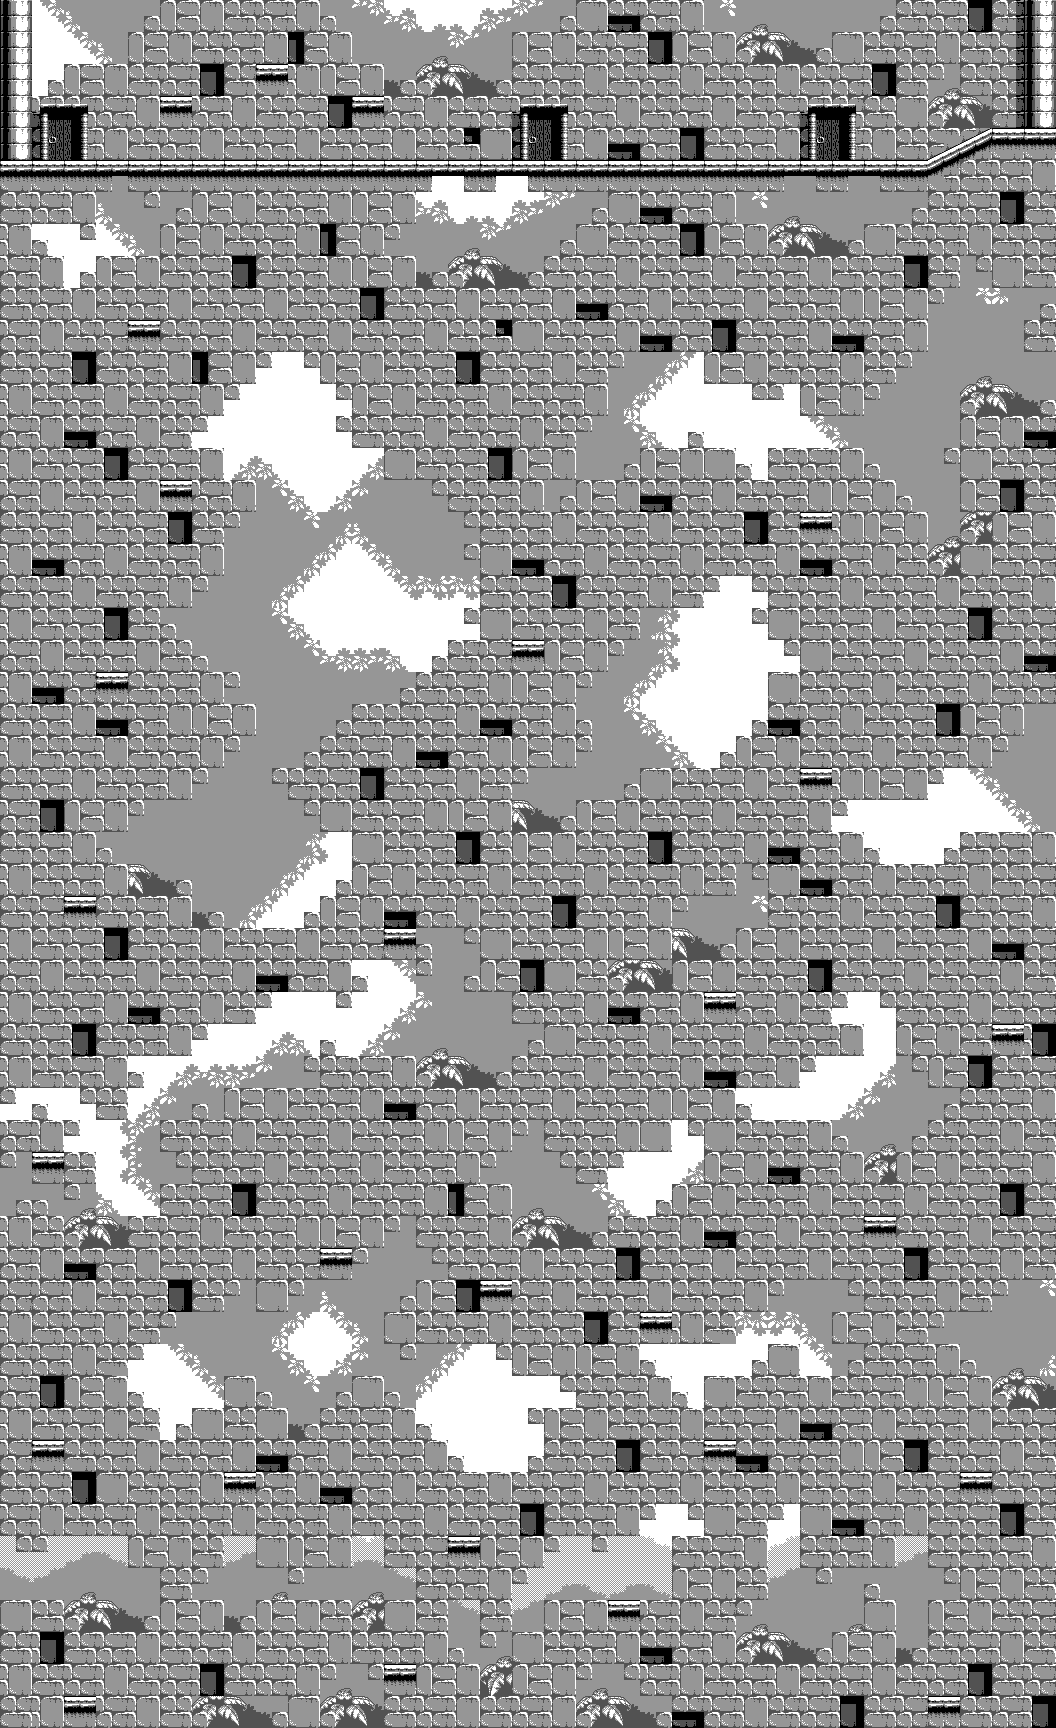
This level is quite outstanding as jumping up the falling stones is your primary objective. At the end of this stage, a single gem and a fight with King Louie await Mowgli. During the boss fight, King Louie occasionally drops items with the shovel (bonus level) being one of them. While jumping from stone to stone is relatively easy, some parts of this level require you to jump on stones without seeing them. At this point having a map comes in handy. With a tool-assisted replay, the level can be beaten in 1:31.
width x height (in pixels): 1056 x 1728
Items:
- 1x bonus level
- 2x boomerang
- 2x double banana
- 1x extra lives
- 1x mask
- 0x stones
- 1x time
Passing Criteria:
- Collect the single gem
- Defeat King Louie
Level 9 (JUNGLE BY NIGHT)
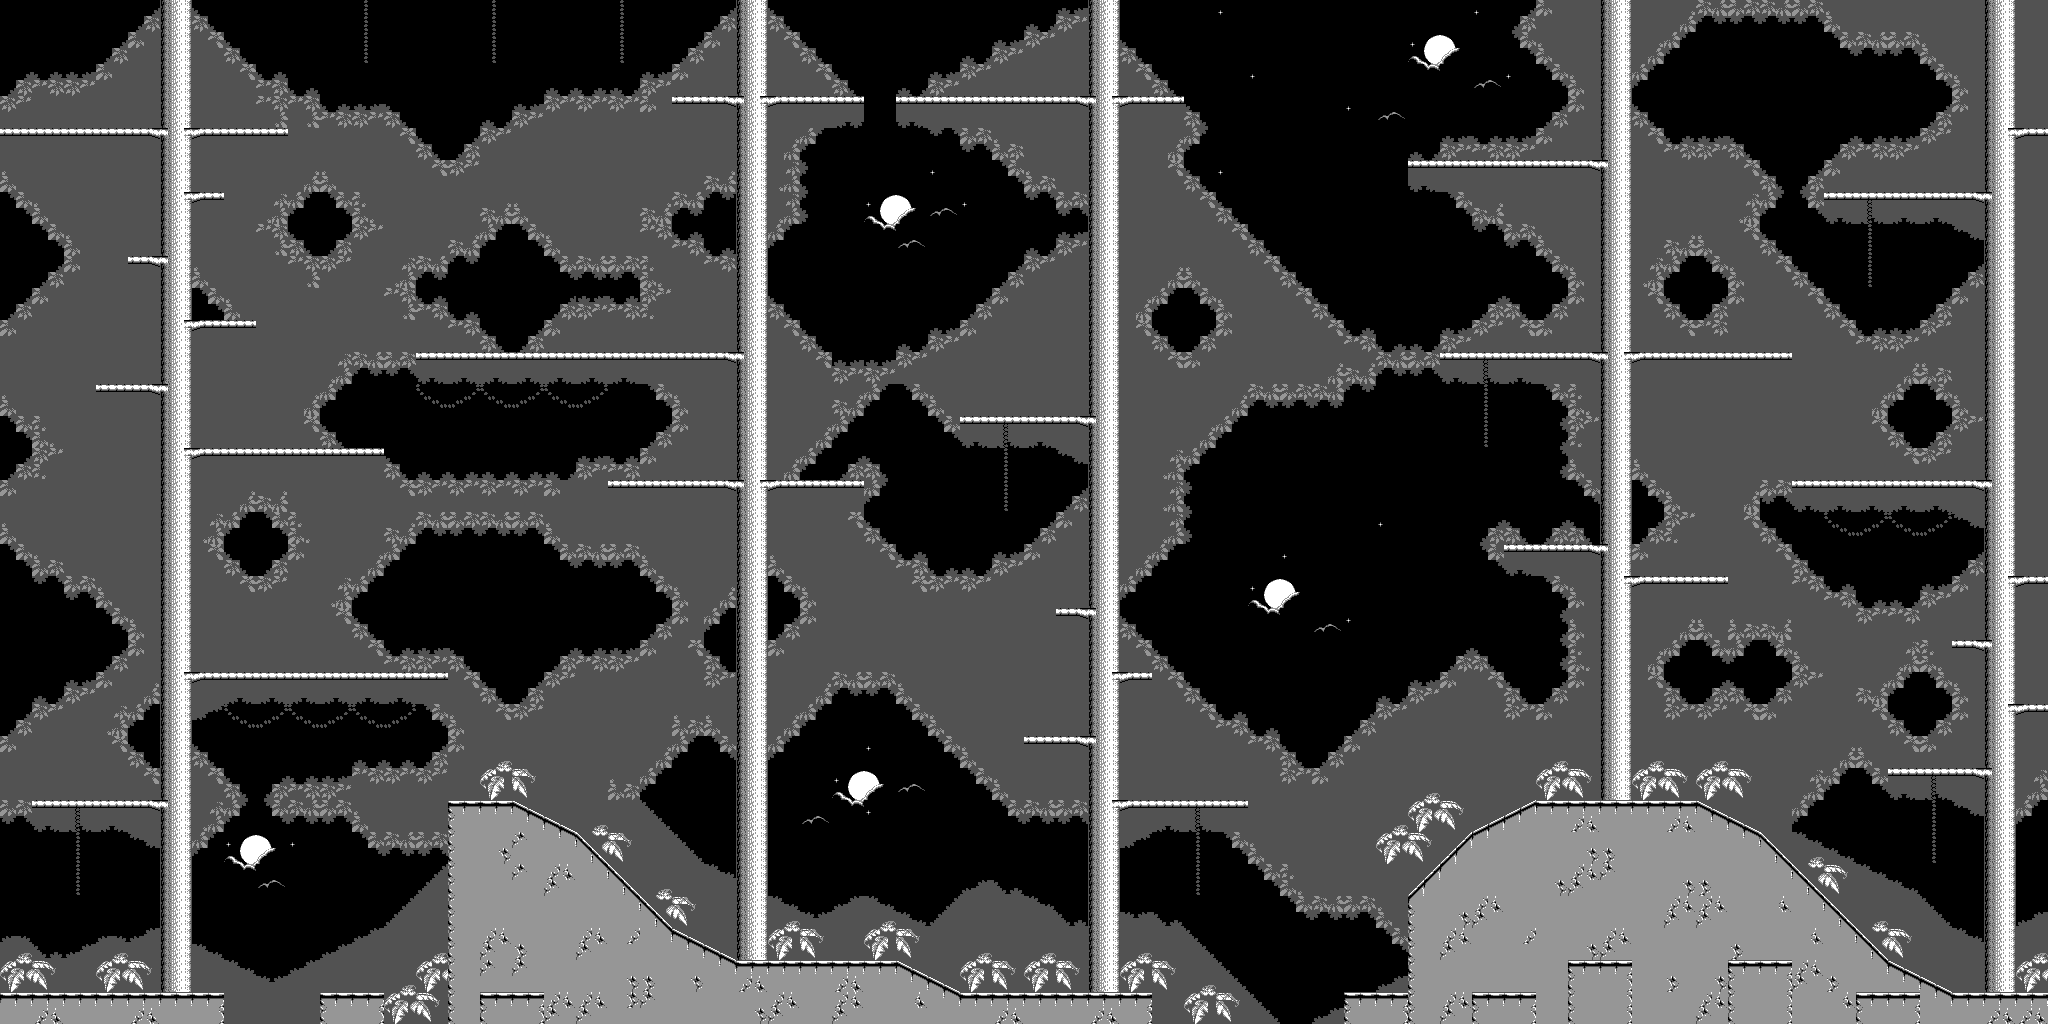
This level plays in a similar setting as the first level, but now by night.
That also seems to be this level’s “gimmick”.
There isn’t really anything worth noting, except for a platform that seems to be unreachable (see “?” in the annotated version).
Finally something really interesting! What secrets might be hidden there? Maybe some easter egg? Or an alternative ending?
Since I was already reverse engineering the game, I was looking for some easy ways to get me there.
I chose to replace all normal jumps with catapult jumps and yeet me up there.
Using the code, this can be achieved by simply replacing JUMP_DEFAULT with JUMP_CATAPULT.
With catapult jumps throwing me through the level I finally arrived at the mysterious platform, and I found… a walking monkey, which drops a health package.
So, I guess this unreachable platform is just a flaw in the level’s design…
With a tool-assisted replay, the level can be beaten in 0:55.
width x height (in pixels): 2048 x 1024
Passing Criteria:
- Collect all gems
Items:
- 1x bonus level
- 2x boomerang
- 3x double banana
- 1x extra lives
- 2x mask
- 0x stones
- 1x time
Level 10 (THE WASTELANDS)
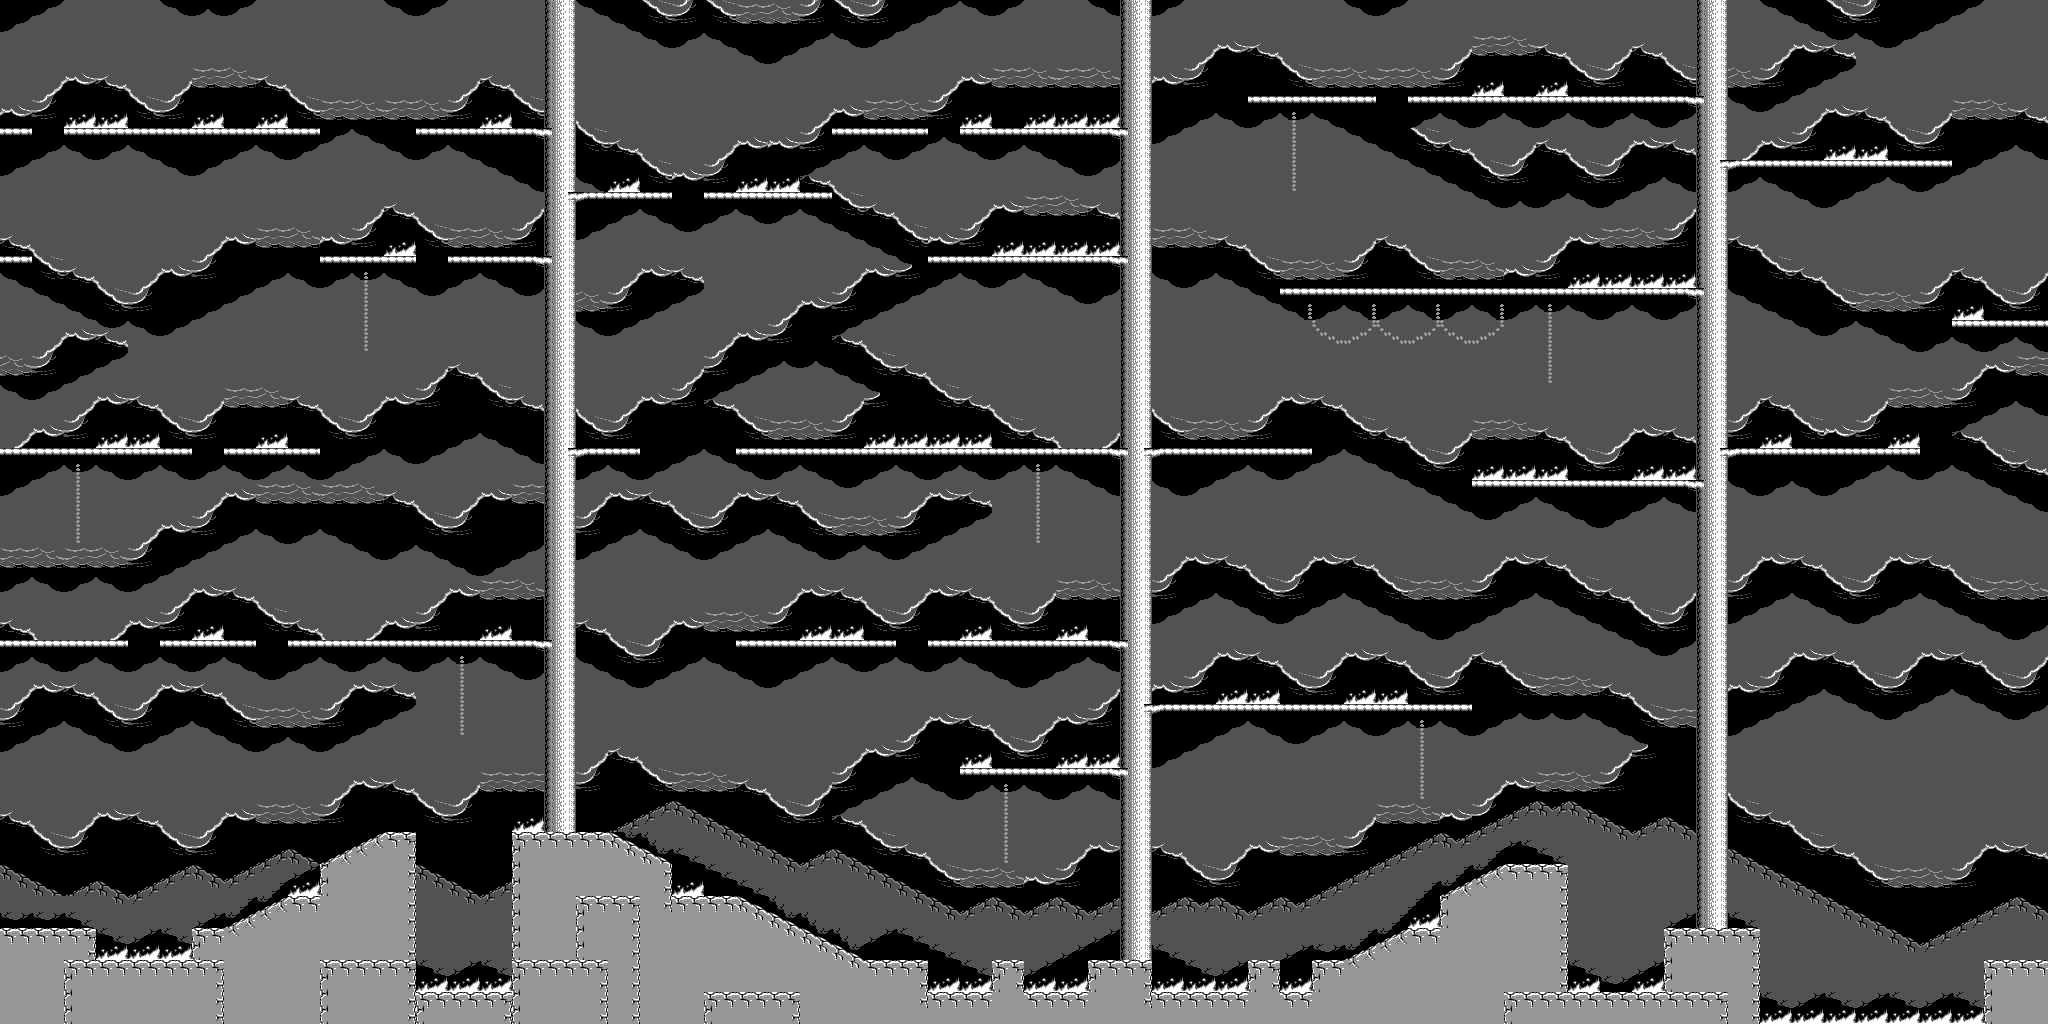
This is the final level in which you have to defeat Shere Khan. Besides some fire on the ground, there’s nothing particularly special. Just be careful with the last checkpoint as it may soft lock you. With a tool-assisted replay, the level can be beaten in 0:44.
Passing Criteria:
- Collect the single gem
- Defeat Shere Khan
Items:
- 0x bonus level
- 2x boomerang
- 0x double banana
- 1x extra lives
- 1x mask
- 2x stones
- 1x time
width x height (in pixels): 2048 x 1024
Level 11 (Bonus)
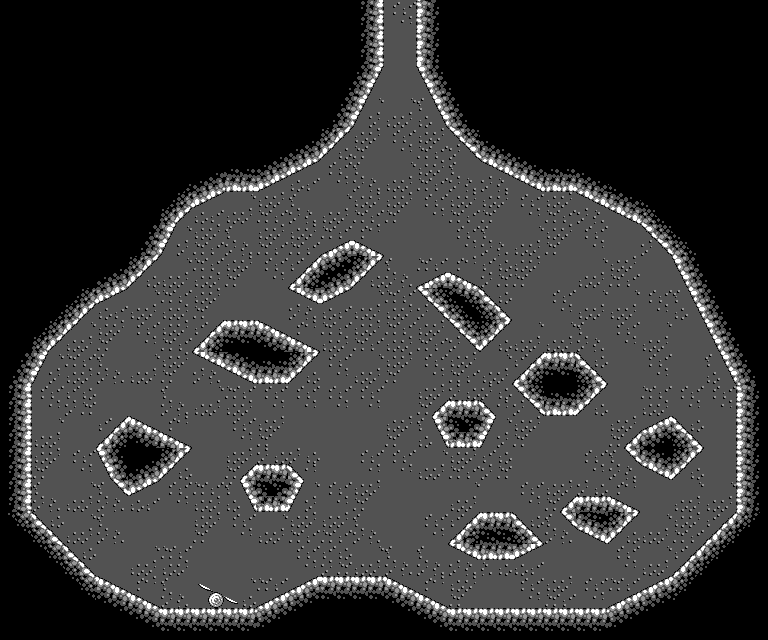
This is the bonus level, which can be reached by collecting a shovel in a regular level. I labeled it “Level 11” due to the game internally encoding it as the 11th level. The point of this level is to gear up Mowgli with all sorts of weapons, extra lives, and continues. However, the actual type of items is randomly determined, which is annotated by a “?” in the annotated version of the level’s map. The level finishes when all eight items have been collected or when the time runs out.
width x height (in pixels): 768 x 640
Items:
- 8x random item
Level 12 (Transition)
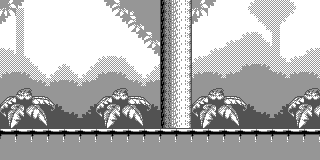
This is the transition “level” which is used in between levels. It’s not really a level, but the game internally encodes it as the 12th level. You cannot move here, and there are several animations playing depending on what you collected in the previous level. Usually you only see the left part of the level, but after finishing Level 10, the camera moves to the right and reveals the girl from the nearby village. Nothing really special happens and after a few seconds the credits are shown.
width x height (in pixels): 320 x 160
Putting It All Together
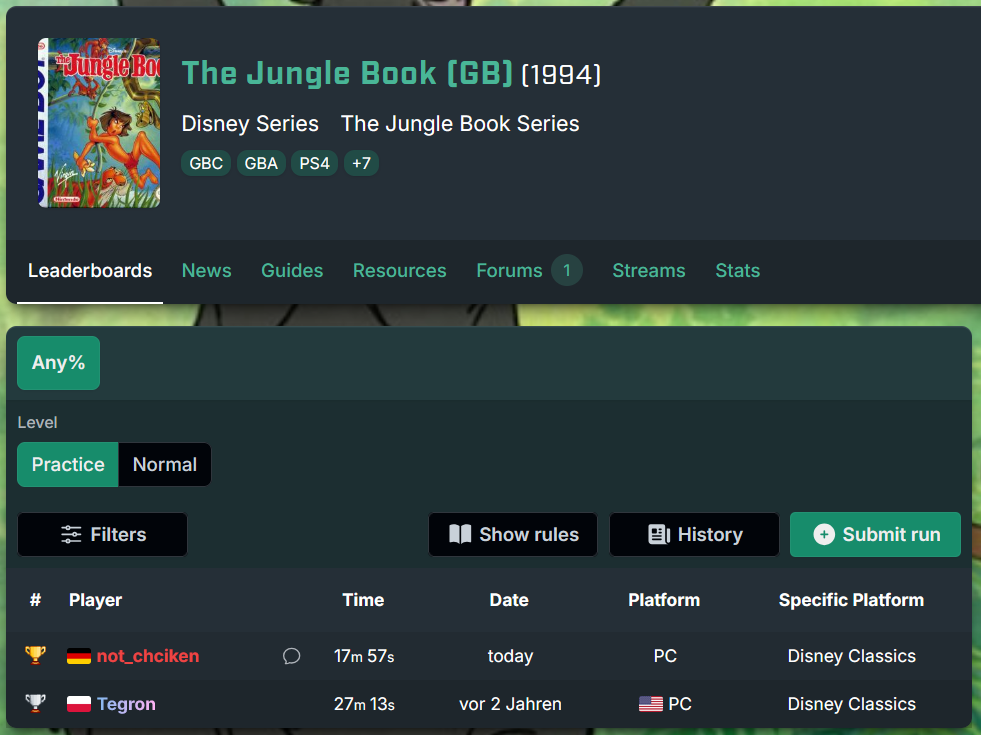
Since I was way too invested into the game, doing a speedrun was the next logical step. Here’s my attempt that I also submitted to www.speedrun.com. To comply with the speedrun rules I played the Disney Classics version.
I fucked up a few times, but I still managed to get the first place 😎
The Reverse Engineering Process
In this section, I highlight the details of extracting the level maps from the game. All code references are taken from the corresponding Github repository.
When I initially planned to extract the maps from this game, I was like: “That’s going to be easy, I just need to find the right memory location and copy the data.” Well, turns out I was wrong, as the game uses way too many methods to cram the maps into the 128 KiB of the cartridge. To understand how much compression you need, let us do some basic calculations. Level 1 (JUNGLE BY DAY) has a size of 3072 x 512 pixels. With two bits per pixel that would be 384 KiB (3072 x 512 x 2 / 8 = 384 KiB) of data. That is around 3 times more than the size of the cartridge (128 KiB). And that is just one of 10 levels. So, what are the tricks here?
The first “trick” is the Game Boy’s way of tile-based rendering. Instead of providing the data for the whole screen pixel per pixel, so pretty much like a framebuffer, you provide 8x8-sized tiles and pointers to the tiles. The idea is to reuse tiles across the screen and save enormous amounts of memory. So, the first step of the reverse engineering process was finding out where the data of the tiles resides in the ROM.
It took me a while, but I managed to find an array that holds pointers to the tiles for every level:
; $409a: A 4-tuple per level (vram pointer0, pointer to compressed data0, vram pointer1, pointer to compressed data1)
; The first pointer points to data for the general level setting (jungle, tree, ruins, etc.).
; The second pointer points to data for level-specific stuff (catapult, elephants, etc.).
CompressedMapBgTilesBasePtr::
    dw $9000, CompressedMapBgTiles1, $96c0, CompressedMapBgTiles10 ; Level 1: JUNGLE BY DAY
    dw $9000, CompressedMapBgTiles2, $96d0, CompressedMapBgTiles20 ; Level 2: THE GREAT TREE
    dw $9000, CompressedMapBgTiles1, $96c0, CompressedMapBgTiles30 ; Level 3: DAWN PATROL
    ...
As already mentioned in the code’s comments, each level has a basic tile palette, such as a plain jungle setting, and some special level-specific tiles, such as the catapult.
Unfortunately, the data is not residing as simple tile palettes in the ROM.
Instead, the data is compressed and the game uses a decompression algorithm to get it in a usable structure.
Also other games, such as Looney Tunes: Carrot Crazy used similar means.
After reverse engineering the code and reading some stuff about compression algorithms, I eventually managed to find out that the developers used the LZ77 algorithm.
If you are interested in the implementation of the algorithm, search the source code for DecompressData.
Using the LZ77 algorithm, the 1728 bytes of tile data for the first level can be compressed to 1247 bytes.
So, a space saving of 27.8%, which is something but not that much.
After rewriting the algorithm in Python, I managed to extract the basic and special tile palettes.
For instance, the combined basic and special tiles for the first level (JUNGLE BY DAYLIGHT) look like this:

Note that for some levels some special cases arise, but this is basically the gist of it.
After obtaining the tiles, the next step is to obtain the indices, also called tile map. These indices are simple 8-bit integer numbers indicating where each tile is put to. At first, I thought the levels would use a simple 2D array. But if I had calculated the size of the array, I could have seen at the beginning that this idea does not work out. With the first level having a size of 3072 x 512 pixels, you would need (3072/8) x (512/8) = 24,576 bytes for the indices. As the other levels have a similar size, putting 10 levels like that into a 128 KiB cartridge does not really work.
So, I had to do some more reverse engineering. The conclusion was that the game uses tiles to create meta tiles (with 16 x 16 pixels, or 2 x 2 tiles). And these meta tiles are again used to create bigger meta tiles (with 32 x 32 pixels, or 4 x 4 tiles). Here are the 2x2 and 4x4 meta tiles of the first level (maybe open them in a new tab and zoom in):


As nicely described in this post, also other games seem to use a similar concept. Using these big meta tiles, the indices of the first level are stored in a 2D array, only requiring (3072/32) x (512/32) = 1536 bytes! Of course you need some data to construct small and big meta tiles, but reusing all kinds of tiles across levels also helps to reduce the memory footprint.
If you want to extract the maps yourself, feel free to use the python script I wrote.
Bugs And Glitches
During the reverse-engineering process as well as my speedrunning attempts, I came across curious design choices or even bugs and glitches. Here are my findings.
Weapon Damage Glitch
Once a projectile hits an enemy, the game calculates the damage an enemy receives with the following code:
...
ld a, [WeaponActive]            ; Glitch: Using the active weapon is not the shot weapon! Damage calculator is broken!
add a                           ; a = 2 * a
jr nz, .NonDefaultBanana
ld a, DAMAGE_BANANA             ; a = 2
.NonDefaultBanana:
inc a                           ; a += 1
ld d, a
ld a, [DifficultyMode]          ; normal = 0, practice = 1
or a
jr z, .NormalMode
sla d                           ; Projectiles deal 2x damage in practice mode.
...
First, the game loads the actively selected weapon, whereby the following values are used: Banana (0), double banana (1), boomerang (2), stones (3). Now that value is multiplied by 2. Except for the default banana which is just set to 2. Then the value is increased by one. Finally, the damage is multiplied by 2 in case the game is played in practice mode.
Using this implementation is somewhat glitchy, because the projectile hitting an enemy is not necessarily the active weapon! So, if you change the weapon using SELECT while a projectile is flying, the flying projectile inherits the damage of the active weapon. For instance, if you fire a double banana and quickly switch to stones, the damage of the bananas is based on the stone damage, allowing you to deal 2x14=28 in a single shot (practice mode assumed). Note that switching to an active weapon requires at least one projectile of that kind.
Teleport Glitch
When using portals to teleport, the player’s position seems to be changed immediately while the view of the window follows an animation. During the animation, the player cannot move unless there is a liana directly under the targeted portal. This liana can be grabbed when pressing the down direction during the animation. Such a scenario can be found in Level 6 (TREE VILLAGE) and allows you to already move forward while the animation is playing. If you go far enough, Mowgli can be placed out of bounds bringing the game into some glitchy state.
Enemy Point Glitch
Hitting an enemy with a projectile grants you 50 points and subtracts the projectile’s damage from the enemy’s health. However, when getting too far away from an enemy, the game unloads the enemy from the RAM. During this process, the decreased health is not stored! Hence, when entering the spawning zone of the enemy, it will respawn with full health, allowing you to hit it again and collect some points.
Conclusion
Thanks for reading this post :) Please write me a mail if you have any corrections, additions, or simply an interesting story about the game.